I wrote Part I of this series to provide a foundation upon which to build a collection of minimal guides to developing software on a Mac. In this post let’s look at what needs to be installed on your Mac for developing NodeJS applications. If you haven’t read Part I, make sure you do and install:
- Homebrew
- Developer Tools
NodeJS
NodeJS can be installed and managing using a number of package managers, just like we saw with Ruby. Or, you can install it directly from nodejs.org. You can even install it with Homebrew!
Homebrew Install
Installing NodeJS with Homebrew is as simple as running brew install node in your terminal.
Both node (the NodeJS engine) and npm (Node Package Manager) are installed:
|
1 2 3 4 5 6 7 |
% node --version v19.1.0 % npm --version 8.19.3 |
Now to install a few node packages in the global environment:
|
1 |
npm install -g dotenv openssl |
Where’d they get installed?
|
1 2 3 4 5 |
$ npm list -g --depth 0 -p /opt/homebrew/lib /opt/homebrew/lib/node_modules/dotenv /opt/homebrew/lib/node_modules/npm /opt/homebrew/lib/node_modules/openssl |
Changing versions
It’s not uncommon to be developing with multiple NodeJS versions, especially in a professional environment. Installing and managing Node versions with Homebrew isn’t too difficult, if you make the decision to only have one version installed at a time. No joke.
|
1 2 3 4 5 6 7 |
% brew search node ==> Formulae libbitcoin-node node-build node@14 nodebrew linode-cli node-sass node@16 nodeenv llnode node@10 node@18 nodenv node node@12 node_exporter ode |
Recall that we installed v19.1.10. As it turns out that isn’t a Long Term Support (LTS) release. Let’s install v14.
|
1 2 |
brew uninstall node brew install node@14 |
You are undoubtedly protesting: “What about all of the cool command line tools I installed through npm?!” You should probably be keeping a list of those and reinstall them.
Using NodeJS.org
NodeJS.org hosts binary package installers for Node. You can install these packages by downloading and then double-clicking on them or via the command-line.
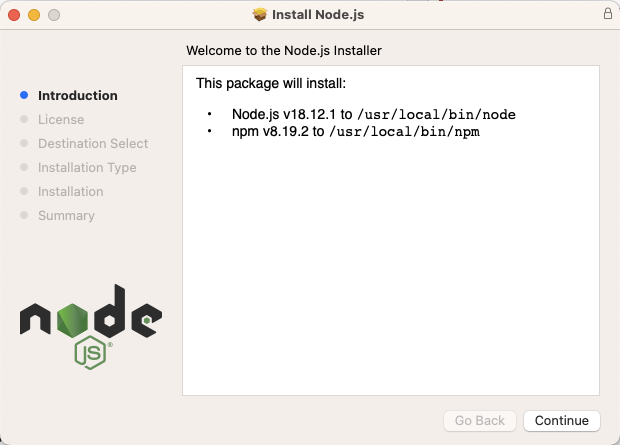
Installing via the command line uses the installer application:
|
1 |
sudo installer -pkg node-v18.12.1.pkg -target / |
If you’ve never used pkgutil before on your Mac, try it out!
|
1 2 3 4 5 6 7 8 9 10 11 12 |
% pkgutil --packages com.apple.pkg.CLTools_SDK_macOS13 com.apple.pkg.CLTools_SDK_macOS12 com.apple.pkg.CLTools_Executables com.apple.files.data-template com.apple.pkg.MRTConfigData_10_15.16U4211 com.apple.pkg.CLTools_SwiftBackDeploy com.apple.pkg.XProtectPayloads_10_15.16U4232 com.apple.pkg.CLTools_macOS_SDK org.nodejs.npm.pkg org.nodejs.node.pkg |
As promised, the NodeJS.org installs node in /usr/local/bin:
|
1 2 3 |
% which node /usr/local/bin/node |
Let’s see where our modules are installed: npm install -g dotenv
|
1 |
npm ERR! Error: EACCES: permission denied, mkdir '/usr/local/lib/node_modules/dotenv' |
Oh! sudo access is required. And that’s why I’d stop right here. NodeJS installed in this manner is not going to support multiple versions and will make your development experience miserable.
Using nvm
A third method of installing NodeJS is through NVM, the Node Version Manager. Of course you can install nvm using their instructions, or use Homebrew.
|
1 2 3 4 5 6 7 8 9 10 11 12 13 14 15 16 17 18 19 20 21 22 23 24 25 26 |
% brew install nvm Please note that upstream has asked us to make explicit managing nvm via Homebrew is unsupported by them and you should check any problems against the standard nvm install method prior to reporting. You should create NVM's working directory if it doesn't exist: mkdir ~/.nvm Add the following to ~/.zshrc or your desired shell configuration file: export NVM_DIR="$HOME/.nvm" [ -s "/opt/homebrew/opt/nvm/nvm.sh" ] && \. "/opt/homebrew/opt/nvm/nvm.sh" # This loads nvm [ -s "/opt/homebrew/opt/nvm/etc/bash_completion.d/nvm" ] && \. "/opt/homebrew/opt/nvm/etc/bash_completion.d/nvm" # This loads nvm bash_completion You can set $NVM_DIR to any location, but leaving it unchanged from /opt/homebrew/opt/nvm will destroy any nvm-installed Node installations upon upgrade/reinstall. nvm list N/A iojs -> N/A (default) node -> stable (-> N/A) (default) unstable -> N/A (default) |
Once you’ve installed a NVM you can use nvm install to install a specific version.
|
1 2 3 4 5 6 7 8 9 10 11 12 13 14 |
nvm install 18 Downloading and installing node v18.12.1... Downloading https://nodejs.org/dist/v18.12.1/node-v18.12.1-darwin-arm64.tar.xz... ######################################################################### 100.0% Computing checksum with shasum -a 256 Checksums matched! Now using node v18.12.1 (npm v8.19.2) Creating default alias: default -> 18 (-> v18.12.1) % which node /Users/joe/.nvm/versions/node/v18.12.1/bin/node % which npm |
And installing the dotenv package.
|
1 2 3 4 5 6 7 8 9 |
% npm install -g dotenv % npm list -g --depth 0 -p /Users/joe/.nvm/versions/node/v18.12.1/lib /Users/joe/.nvm/versions/node/v18.12.1/lib/node_modules/corepack /Users/joe/.nvm/versions/node/v18.12.1/lib/node_modules/dotenv /Users/joe/.nvm/versions/node/v18.12.1/lib/node_modules/npm |
Creating a Basic Application
With NodeJS installed, let’s take it for a spin and write a “simple” application that reads data from a Postgres database.
|
1 2 3 4 5 6 7 |
% mkdir ~/projects/nodejs/simple_node_app % cd ~/projects/nodejs/simple_node_app % npm init -y Wrote to /Users/joe/projects/nodejs/simple_node_app/package.json |
We’ll be using the pg, dotenv, and yargs packages.
|
1 |
npm install pg dotenv yargs --save-deps |
Of course, to communicate with a Postgres database we’ll need one! Here we’ll install Postgres, start it, and then create a new database, user, and grants for this example.
|
1 2 3 4 5 6 7 8 9 10 11 12 13 |
% brew install postgresql % brew services start postgresql % psql postgres psql (14.6 (Homebrew)) Type "help" for help. postgres=# create database simple_node_app_db; postgres=# create user simple_node_app_user with password 'simple_node_app_pw'; postgres=# grant all privileges on database simple_node_app_db to simple_node_app_user; postgres=# \q |
Back to our Node code. We’ll put the following in index.js:
|
1 2 3 4 5 6 7 8 9 10 11 12 13 14 15 16 17 18 19 20 21 22 23 24 25 26 27 28 29 30 31 32 33 34 |
require("dotenv").config(); var argv = require('yargs/yargs')(process.argv.slice(2)).argv const { Client } = require("pg"); const database = new Client(); async function createUser(username) { await database.connect(); await database.query("CREATE TABLE users (username VARCHAR(32))", (err, res) => { // Ignore errors }); console.log(`Inserting user ${username}`); await database.query("INSERT INTO users (username) values ($1)", [username]); database.end().then(() => { console.log("Exiting..."); process.exit(); }); } if (argv.username) { let username = argv.username; createUser(username); } else { console.log("Usage: node index.js --username USERNAME"); } |
You can try running this as is, but the connection to the database will fail. That can be fixed with a .env file which utilizes the pg default environment variables for the database, username, password, etc.
|
1 2 3 4 |
PGUSER=simple_node_app_user PGPASSWORD=simple_node_app_password PGHOST=localhost PGDATABASE=simple_node_app_db |
|
1 2 3 4 |
% node index.js --username joe Inserting user joe Exiting... |
Which Installation Method to Use?
I recommend using either Homebrew or NVM for installing and managing versions of NodeJS. Uninstalling the version provided by NodeJS.org is a pain in the ass, but can be done. I wouldn’t recommend the method
here, but rather use this method.
WARNING: sudo and rm -f ahead. Always read and get a feeling for what commands do before running them. You may consider commenting out the rm command to see what files are going to be removed.
|
1 2 3 4 5 6 |
% for f in `pkgutil --only-files --files org.nodejs.node.pkg`; do echo "Removing /$f" sudo rm -f /$f done |
followed by
|
1 2 3 4 5 |
for f in `pkgutil --only-files --files org.nodejs.npm.pkg`; do echo "Removing /$f" sudo rm -f /$f done |
and finally,
|
1 2 3 4 5 6 |
% sudo pkgutil --forget org.nodejs.node.pkg Forgot package 'org.nodejs.node.pkg' on '/'. % sudo pkgutil --forget org.nodejs.npm.pkg Forgot package 'org.nodejs.npm.pkg' on '/'. |