This is part one in a series of posts for developing on a Mac. Note the distinction between developing on and for a Mac. We’re going to be covering the former and not so much the latter.
So you’ve got a fresh Mac, or have never used your Mac for software development. Let’s get some key tools installed.
iTerm2
If you’re a developer the command line is your friend, and you interact with the command line in a terminal. iTerm2 is a replacement for the macOS Terminal application, and is, in my opinion, the best terminal application out there (and trust me, I’ve tried them all). Once you download iTerm and run it for the first time you’ll see:
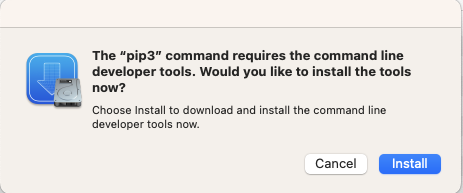
Click Install! The Developer Tools are a key component to doing any software development on a Mac, so you might as well install it now.
Oh My Zsh
Okay, this one isn’t strictly required, but just adds some sexy to your development environment. Skip this step if you want (to be boring), otherwise head on over to Oh My Zsh and up your shell game.
For a quick install, paste the following into your terminal.
sh -c "$(curl -fsSL https://raw.github.com/ohmyzsh/ohmyzsh/master/tools/install.sh)"
Command Line Developer Tools
If you installed iTerm2 and clicked Install when prompted to install the command line developer tools, you’ll already have this. If you didn’t, they can be installed easily with xcode-select --install. To be clear, the developer tools are required for development on a Mac, and many tools will prompt you if they’re needed (like iTerm2 did!)
A side note: it always amuses me when a simple question such as How do I install results in Stackoverflow posts such as this one. For whatever reason the method of installing the command line developer tools is a moving target.
Homebrew
Homebrew is, by far, the best package manager for the Mac, and countless instructions are going to have you brew install something. Head on over to Homebrew and use the installation instructions (you will need sudo for this).
For a quick install, paste the following into your terminal:
/bin/bash -c "$(curl -fsSL https://raw.githubusercontent.com/Homebrew/install/HEAD/install.sh)"
Don’t ignore the output from Homebrew’s install!
[code lang=text]
==> Next steps:
– Run these three commands in your terminal to add Homebrew to your PATH:
echo '# Set PATH, MANPATH, etc., for Homebrew.' >> /Users/joe/.zprofile
echo 'eval "$(/opt/homebrew/bin/brew shellenv)"' >> /Users/joe/.zprofile
eval "$(/opt/homebrew/bin/brew shellenv)"
[/code]
Failing to do this will result in zsh: command not found: brew
What’s Installed Now?
After this basic setup you have:
- iTerm
- oh-my-zsh
- Homebrew
In addition, there are a lot of tools used in software development already there:
- curl
- python3 (Python 3.9)
- ruby (Ruby 2.6)
- perl (Perl 5)
- tclsh (TCL)
- git (revision control system)
- clang (a C, C++, and Objective-C compiler)
- gcc (on a Mac, it is
clangin disguise) - swiftc (the Swift compiler) and swift (the Swift interpreter)
What isn’t installed by default:
We’ll talk more about this in a moment!
Installing an Editor
There are a number of editors and integrated development environments (IDEs) to choose from. If you are a programmer and already fall into one of the main camps (vi and emacs) many of them will allow you to set your key bindings to one flavor or another.
Here are some of my favorites:
And of course, if you’re going to do development for the Mac or other Apple devices (iPhone, Watch, etc.) Xcode is more or the less the required IDE.
The Environment Trap
One of the never-ending challenges (and frustrations) of software development is managing all of the different versions of toolchains, compilers, interpreters, libraries, packages, and configurations. Invariably you’ll run into dependency hell sooner or later and find yourself in a situation where you’re tempted to erase your Mac and start over. When developing on a Mac be mindful of using sudo (you’re likely installing something system-wide that can conflict with other packages), and try to utilize software such as RVM or virtualenv. Unfortunately, there are a plethora of these dependency/environment managers as well making it even more confusing!
Where to From Here
My goal with this first post was to serve as a launching point for tutorials on installing tools for developing in other languages and ecosystems. For example, you’ll notice we didn’t cover Rails, NodeJS, Rust, etc. All of these and more are supported quite nicely on macOS with the right software installed.