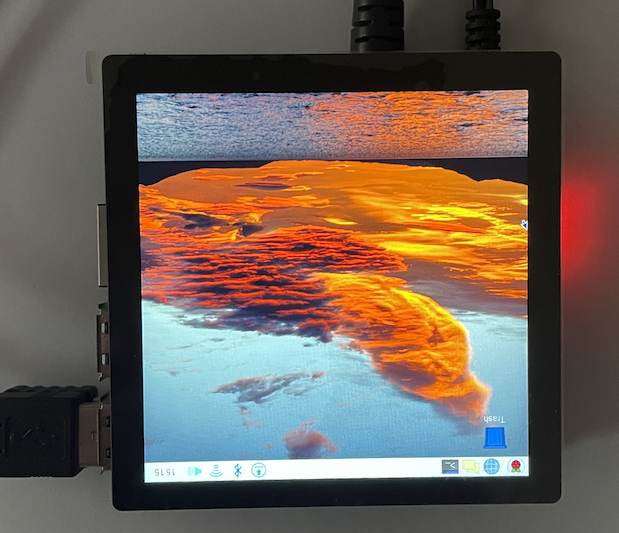
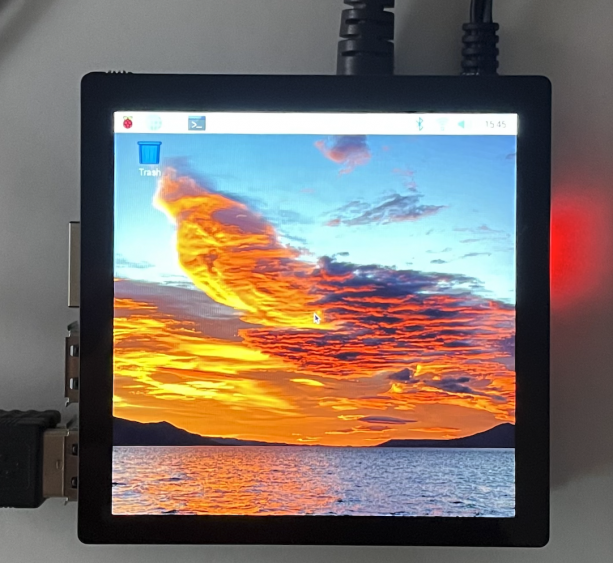
You may have noticed that Raspberry Pi 4s are a bit hard to come by these days. The all-knowing Google even predicts you’re searching for an alternative to a Pi 4!
Well, if you’re like me, you probably have some Pi 3s lying around and wonder if they’re still up to the task. They are, even if you have to coax some hardware or software that has since moved on. This includes the HyperPixel 4.0 that took a little work. In particular, we’ll be looking at the 720×720 pixel 4.0 Inch Square which I’m using for a weather display.
Disclaimer! These instructions are for using the HyperPixel 4.0 with a Raspberry 3 and shouldn’t be used with a Pi 4! Head over to GitHub if you have a Pi 4.
Start off with a fresh Raspberry Pi image. I’m on a Mac and will use Raspberry Pi Imager. You can choose either the 32 or 64-bit image. After flashing your image and setting up the Pi, log in and download the Hyperpixel 4.0 firmware for the Pi 3. Note the branch!
[code lang=”text”]
git clone https://github.com/pimoroni/hyperpixel4 -b pi3
[/code]
After cloning the repository go into it and run sudo ./install.sh.
|
1 2 3 4 5 6 7 8 9 10 11 12 13 14 15 16 17 18 19 20 21 22 23 24 25 26 27 |
joe@raspberrypi:~ $ cd hyperpixel4/ joe@raspberrypi:~/hyperpixel4 $ sudo ./install.sh Notice: building hyperpixel4.dtbo Created symlink /etc/systemd/system/multi-user.target.wants/hyperpixel4-init.service -> /etc/systemd/system/hyperpixel4-init.service. Installed: /usr/bin/hyperpixel4-init Installed: /etc/systemd/system/hyperpixel4-init.service Installed: /usr/bin/hyperpixel4-rotate Installed: /boot/overlays/hyperpixel4.dtbo Config: Added dtoverlay=hyperpixel4 to /boot/config.txt Config: Added overscan_left=0 to /boot/config.txt Config: Added overscan_right=0 to /boot/config.txt Config: Added overscan_top=0 to /boot/config.txt Config: Added overscan_bottom=0 to /boot/config.txt Config: Added enable_dpi_lcd=1 to /boot/config.txt Config: Added display_default_lcd=1 to /boot/config.txt Config: Added display_rotate=0 to /boot/config.txt Config: Added dpi_group=2 to /boot/config.txt Config: Added dpi_mode=87 to /boot/config.txt Config: Added dpi_output_format=0x7f216 to /boot/config.txt Config: Added hdmi_timings=480 0 10 16 59 800 0 15 113 15 0 0 0 60 0 32000000 6 to /boot/config.txt Before rebooting, use 'hyperpixel4-rotate left/right/normal/inverted' to rotate your display! left - Landscape, power/HDMI on bottom right - Landscape, power/HDMI on top normal - Portrait, USB ports on top inverted - Portrait, USB ports on bottom |
Ignore the hyperpixel4-rotate command for now. Here’s where the tweaks begin. Edit /boot/config.txt and comment out the following line:
[code lang=text]
dtoverlay=vc4-kms-v3d
[/code]
That is you should have something like:
[code lang=text]
# Enable DRM VC4 V3D driver
#dtoverlay=vc4-kms-v3d
max_framebuffers=2
[/code]
Then go down to the section that looks like this:
[code lang=text]
dtoverlay=hyperpixel4
overscan_left=0
overscan_right=0
overscan_top=0
overscan_bottom=0
enable_dpi_lcd=1
display_default_lcd=1
display_rotate=0
dpi_group=2
dpi_mode=87
dpi_output_format=0x7f216
hdmi_timings=480 0 10 16 59 800 0 15 113 15 0 0 0 60 0 32000000 6
[/code]
Change dpi_output_format to 0x5f026. Then, comment out the hdmi_timings line and add:
[code lang=text]
dpi_timings=720 0 20 20 40 720 0 15 15 15 0 0 0 60 0 36720000 4
[/code]
Your configuration section for the Hyperpixel should look like:
[code lang=text]
[all]
dtoverlay=hyperpixel4
overscan_left=0
overscan_right=0
overscan_top=0
overscan_bottom=0
enable_dpi_lcd=1
display_default_lcd=1
display_rotate=0
dpi_group=2
dpi_mode=87
dpi_output_format=0x5f026
#hdmi_timings=480 0 10 16 59 800 0 15 113 15 0 0 0 60 0 32000000 6
dpi_timings=720 0 20 20 40 720 0 15 15 15 0 0 0 60 0 36720000 4
[/code]
Rotating the Display
In its original configuration, the Hyperpixel 4.0 is “upside down” for my purposes.
We can fix this with the display_rotate parameter.
normal–display_rotate=0right–display_rotate=1inverted–display_rotate=2left–display_rotate=3
In my case I set display_rotate=2.
After a reboot we’re in business!


