I can already hear the rabble shouting, “Why would you use GoDaddy as your domain registrar?!” A fair question, but sometimes we don’t always get to choose our domain registrar (e.g., we inherited it) and aren’t in a position to change it. But that doesn’t mean GoDaddy has to provide DNS management for your domain.
In this post I’ll show you how to change your domain’s nameservers from GoDaddy to AWS’ Route 53. Reader Beware: In this post we are going to change a domain’s nameservers from one provider (GoDaddy) to another (AWS). Note that this is not (I repeat, not) the same as transferring your DNS entries. I joke about GoDaddy’s repeated warnings that changing “nameservers” is risky, but unless your zone files have been populated in the new environment, you will definitely be in for calamity when your hostnames no longer resolve.
Getting AWS Route 53 Ready
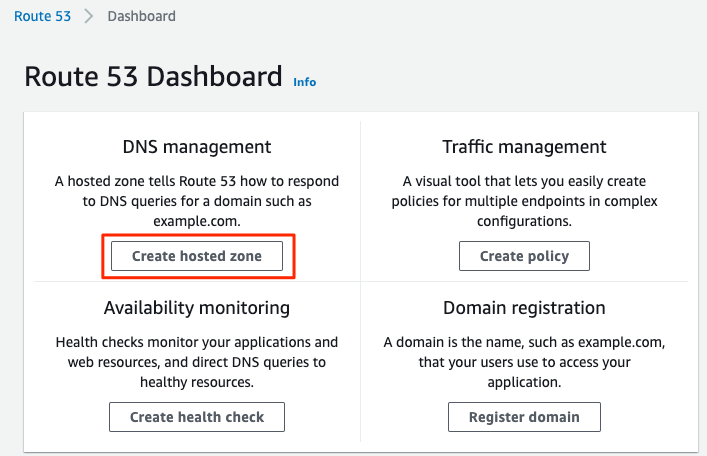
Our first step is to create a hosted zone in AWS Route 53. Login in to your AWS account and go to the Route 53 dashboard and click Create hosted zone.
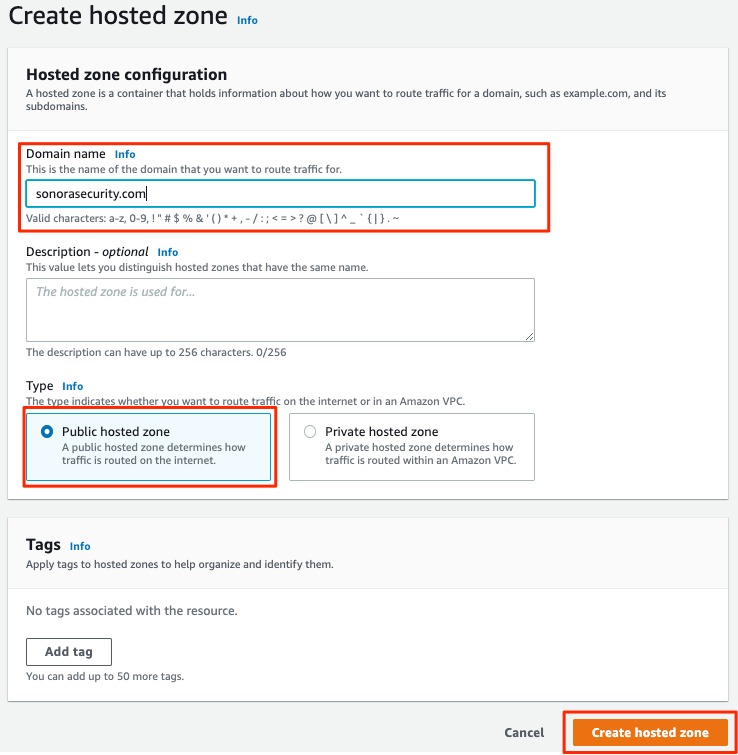
Our zone will be for the domain sonorasecurity.com and it will be a public hosted zone, in that we want public Internet DNS queries for our domain to be resolved. Once you’ve filled in this information, click Create hosted zone.
 Once the zone is created you’ll see two DNS entries automatically created, an
 NS entry and an SOA entry.
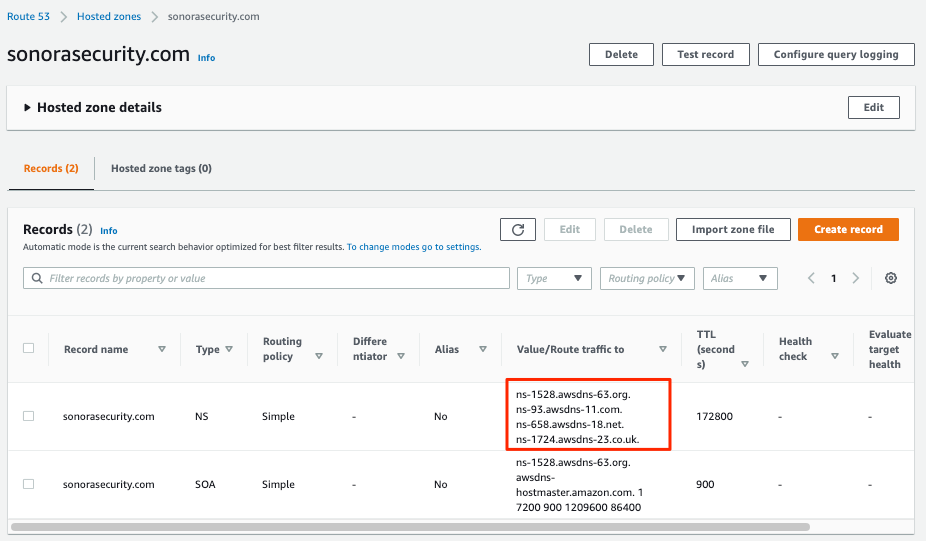
We’re interested in the NS entry and the fully-qualified domain names listed. In this example there are four nameservers listed:
ns-1528.awsdns-63.orgns-95.awsdns-11.comns-658.awsdns-18.netns-1724.awsdns-23.co.uk
We’re going to now use these values in our GoDaddy account to change the nameservers for our domain sonorasecurity.com.
Updating Our Nameservers
Before we update our domain’s nameservers, let’s verify that they are currently hosted by GoDaddy. In a shell type dig +short NS <your_domain_name>. For example:
[code lang=text]
dig +short NS sonorasecurity.com
ns07.domaincontrol.com.
ns08.domaincontrol.com.
[/code]
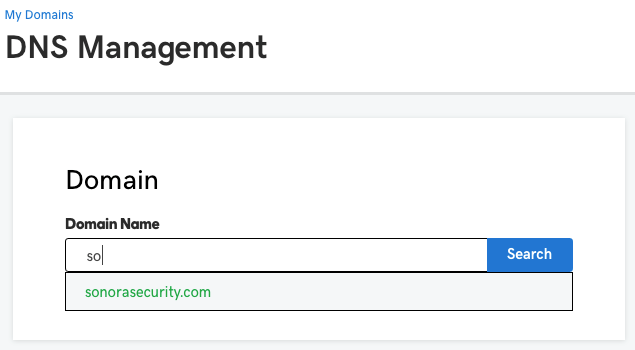
So far so good. Now login to your GoDaddy account that manages the domain, and go over to the DNS Management page. Type in your domain name and select it in the dropdown box.
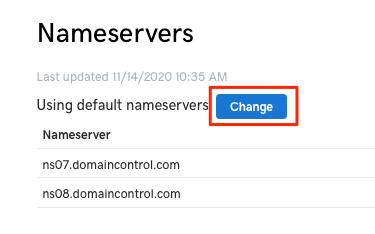
Scroll down and find the Nameservers section and next to Using default nameservers click the Change button.
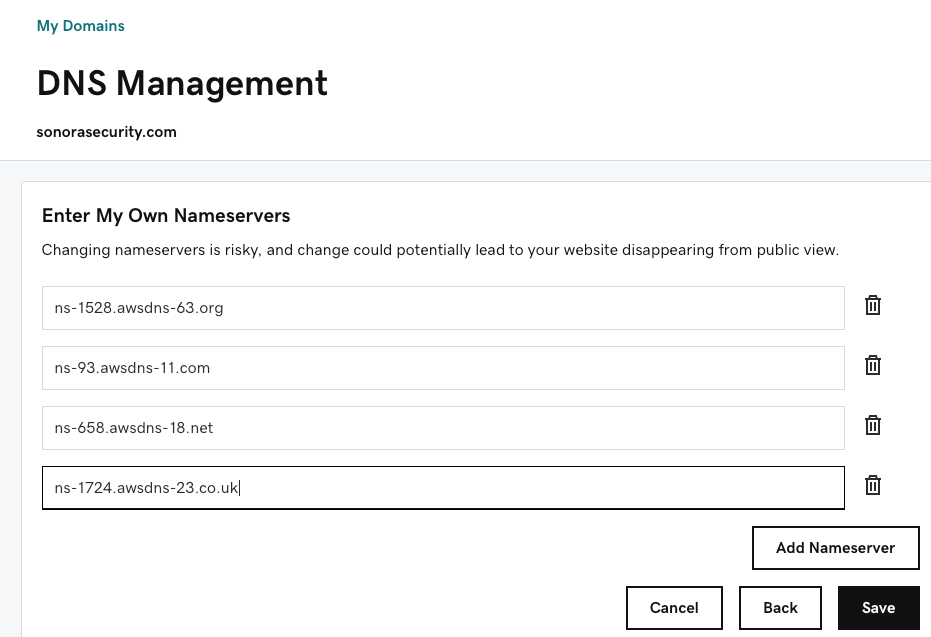
Here is where it becomes comical how many times GoDaddy implores us not to try to change nameservers. The first page warns you that Changing nameservers is risky. While that is true if you don’t know what you’re doing, you’re a professional, so click on Enter my own nameservers (advanced).

You’ll be presented with a form for entering our AWS nameserver FQDNs. Here it is important to take note to not add the period after the FQDN (GoDaddy will give you an Unexpected Error Occurred message if you try).
Enter all of the nameservers listed in the AWS NS record and click Save.
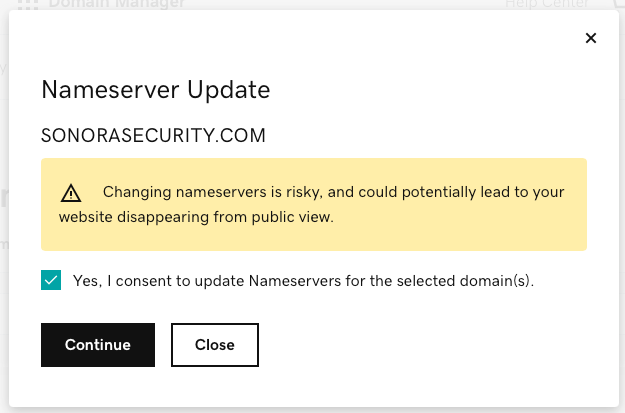
Once again we get a warning about our risky behavior! Yes, yes. Check, Yes, I consent and click Continue.
After clicking Continue you will likely see a banner at the top of the DNS management page indicating a change is in progress. Once completed you’ll see your nameservers listed, and GoDaddy indicating that “We can’t display your DNS information because your nameservers aren’t managed by us.”
Now, in a terminal you can type dig +short NS <your_domain_name> and you should see your nameservers updated, like this:
[code lang=text]
dig +short NS sonorasecurity.com
ns-1528.awsdns-63.org.
ns-1724.awsdns-23.co.uk.
ns-658.awsdns-18.net.
ns-93.awsdns-11.com.
[/code]
And there you have it, your domain’s DNS entries can now be managed with AWS Route 53!