Ubuntu 24.04 LTS, the “Noble Numbat”, has arrived, and I wanted to get Greenbone OpenVAS up and running on it. OpenVAS is a powerful, but complex, collection of software, used by many to perform vulnerability scans against their IT infrastructure. With more than a half-dozen components and use of external data feeds, Redis, Postgres, and an MQTT broker, installing and running it successfully can be a challenge.
The overview below, and resulting Github repository, is based upon following the source build instructions. I also recommend reading the OpenVAS glossary to familiarize yourself with the terms.
First, a warning! I’ve personally executed these steps a half-dozen times and tested the outcome (a running OpenVAS installation). However, you should understand the basics of the commands and be up to the challenge of troubleshooting in case you run in trouble.
Another couple of warnings. My scripts do not use GPG to verify the tar signatures of Greenbone’s packages. You will also be running these commands as root. There are some that might object to that, and insist on using sudo. I can assure you that doing so will cause heartburn.
Alright, with that out of the way, I recommend you start with a VM with a fresh install of Ubuntu 24.04. If you can, configure the VM with 4 to 8 cores, at least 8GB of RAM, and 64GB of disk space. Then:
|
1 2 3 4 |
sudo su cd /tmp git clone https://github.com/iachievedit/build_openvas cd build_openvas |
Make note of the two top-level scripts exports.sh and install.sh. exports.sh is sourced by individual scripts in scripts/, primarily to allow you to run scripts independently.
Quick Start
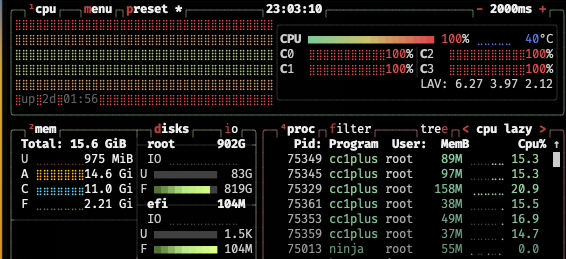
So, this won’t necessarily be quick, as it does take some time to build OpenVAS and bootstrap the feeds. For a VM running on an M3 Max (8 cores, 16GB of RAM), it took 44 minutes total, but again, much of that was downloading the feed.
|
1 2 3 4 5 6 |
root@openvas:/tmp/build_openvas time ./install.sh ... real 44m16.502s user 10m38.669s sys 0m57.051s |
One by One
If you prefer, you can execute each script one at a time. I, in fact, recommend this, if you want to get a feel for how OpenVAS is built from the ground up.
Setting Up
The first three scripts set the stage for the build by creating the gvm user and group, making the source, build, and install directories, and then installing all of the primary dependencies (and there are a lot). There is one nuance you’ll find and that is python3-packaging has been explicitly removed from the install list, and when building osp-openvas it is removed. For whatever reason having it present causes problems.
Building
Scripts 10 through 18 download, build, and install everything. These should be executed in order, and that order matches the canonical build instructions here.
Architecture Configuration
Scripts 90 through 95 cobble together “the architecture”. redis, postgres, and mosquitto are all installed and configured. Interestingly mosquitto was omitted as a dependency in the installation instructions, but it is most definitely required as the MQTT broker (“aka MQTT message bus”).
Bootstrapping
The longest part of the installation and configuration of OpenVAS is greenbone-feed-sync, which is responsible for downloading Notus, NASL, and SCAP files.
|
1 2 3 4 5 6 7 8 9 10 11 12 13 14 15 |
root@openvas:/tmp/build_openvas/scripts# ./97_sync.sh + This will take some time. Running as root. Switching to user 'gvm' and group 'gvm'. Trying to acquire lock on /var/lib/openvas/feed-update.lock Acquired lock on /var/lib/openvas/feed-update.lock ⠏ Downloading Notus files from rsync://feed.community.greenbone.net/community/vulnerability-feed/22.04/vt-data/notus/ to /var/lib/notus ⠦ Downloading NASL files from rsync://feed.community.greenbone.net/community/vulnerability-feed/22.04/vt-data/nasl/ to /var/lib/openvas/plugins Releasing lock on /var/lib/openvas/feed-update.lock Trying to acquire lock on /var/lib/gvm/feed-update.lock Acquired lock on /var/lib/gvm/feed-update.lock ⠴ Downloading SCAP data from rsync://feed.community.greenbone.net/community/vulnerability-feed/22.04/scap-data/ to /var/lib/gvm/scap-data ⠏ Downloading CERT-Bund data from rsync://feed.community.greenbone.net/community/vulnerability-feed/22.04/cert-data/ to /var/lib/gvm/cert-data ⠋ Downloading gvmd data from rsync://feed.community.greenbone.net/community/data-feed/22.04/ to /var/lib/gvm/data-objects/gvmd/22.04 Releasing lock on /var/lib/gvm/feed-update.lock |
Start!
Finally, start everything up!
|
1 2 3 4 5 6 7 |
./99_start.sh + Go for launch Created symlink /etc/systemd/system/multi-user.target.wants/ospd-openvas.service → /etc/systemd/system/ospd-openvas.service. Created symlink /etc/systemd/system/multi-user.target.wants/gvmd.service → /etc/systemd/system/gvmd.service. Created symlink /etc/systemd/system/greenbone-security-assistant.service → /etc/systemd/system/gsad.service. Created symlink /etc/systemd/system/multi-user.target.wants/gsad.service → /etc/systemd/system/gsad.service. Created symlink /etc/systemd/system/multi-user.target.wants/openvasd.service → /etc/systemd/system/openvasd.service. |
|
1 2 3 4 5 6 |
root@openvas:/var/log/gvm# ls -l total 16 -rw-r--r-- 1 gvm gvm 79 May 27 21:53 gsad.log -rw------- 1 gvm gvm 8126 May 27 21:53 gvmd.log -rw-r--r-- 1 gvm gvm 0 May 27 21:53 openvas.log -rw-r--r-- 1 gvm gvm 381 May 27 21:53 ospd-openvas.log |
If you look at the logs you should see lines like:
Finished loading VTs. The VT cache has been updated from version 0 to 202405270604.

Updated NVT cache from version 0 to 202405270604
Pay particular attention to the gvmd.log as it is the best indicator of when things “are ready.”
First Scan
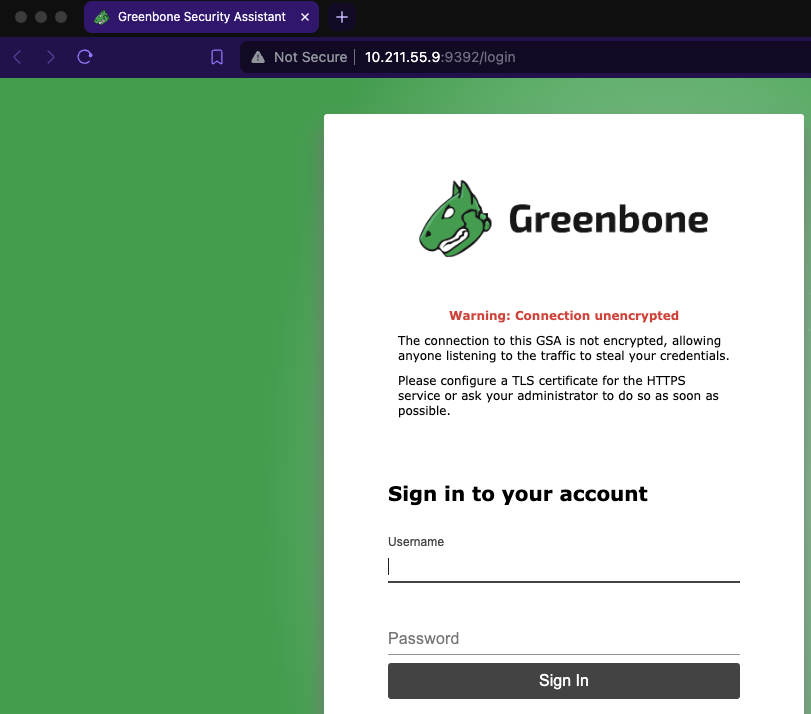
The scripts created a default admin password and left it in adminpass.txt. In a browser, go to http://YOUR_MACHINE:9392 and you should see:
A Quick Scan
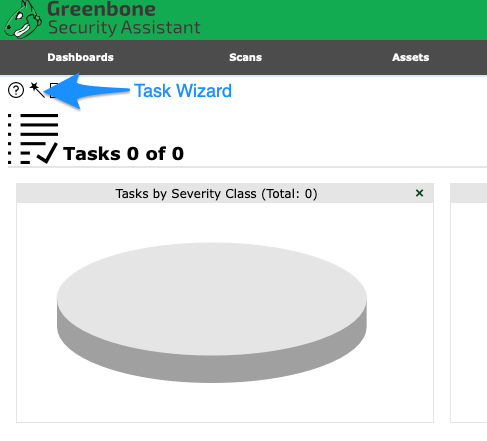
A quick scan starts with going to the Tasks menu item under Scans. From here, click on the “wand” icon to bring up the Task Wizard.
Enter the IP address of the host you want to scan (or, if DNS is configured, the FQDN). In our case we’ll scan a Proxmox hypervisor.
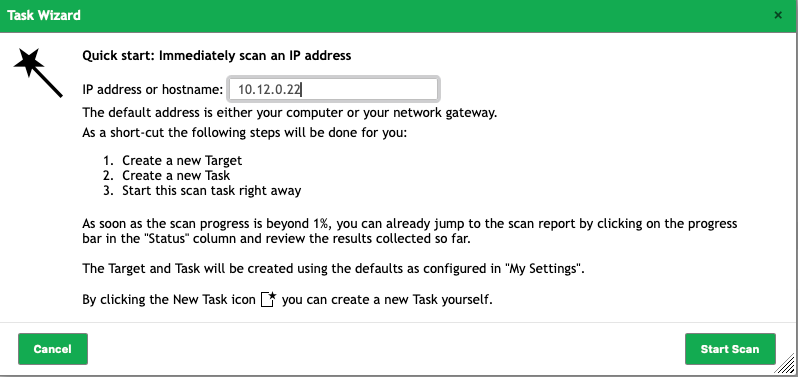
Click Start Scan and be patient as OpenVAS performs the scan.
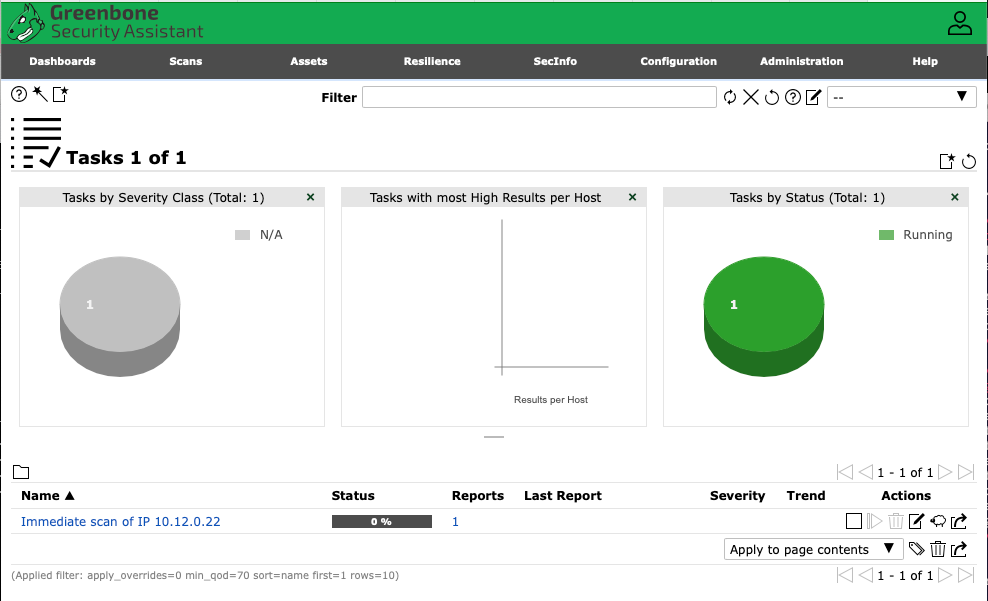
As with any “percent complete” UI, you’ll get to 99% complete quickly, only to wait a bit for it to finish.
Next Steps
You will want to secure your connection with HTTPS. The most straightforward way to do so is to change the the ExecStart for GSAD (/etc/systemd/system/gsad.service) from
|
1 |
ExecStart=/usr/local/sbin/gsad --foreground --listen=0.0.0.0 --port=9392 --http-only |
to
|
1 |
ExecStart=/usr/local/sbin/gsad --foreground --listen=0.0.0.0 --port=9392 -c <CERT_PATH> -k <PRIVKEY_PATH> --no-redirect |
where CERT_PATH and PRIVKEY_PATH are full paths to your certificate and private key. I typically use Let’s Encrypt to obtain these.
After updating the GSAD unit file, make sure and issue systemctl daemon-reload and then restart GSAD with systemctl restart gsad.