
Update: Folks have figured out how to use sigaction which is the preferred way of catching a signal. Jump down to read all about it, both signal and sigaction methods work!
Unix applications frequently have a need to catch, or trap, signals. For example, many daemons will reread their configuration file upon receipt of the SIGHUP signal. A client interface may catch CTRL-C and print Are you sure you want to quit? [yN].
This can be accomplished in Swift on Linux as well by using the signal function from Glibc. The code, which is a play on Adam Sharp’s gist:
|
1 2 3 4 5 6 7 8 9 10 11 12 13 14 15 16 17 18 19 20 21 22 23 |
import Glibc enum Signal:Int32 { case HUP = 1 case INT = 2 case QUIT = 3 case ABRT = 6 case KILL = 9 case ALRM = 14 case TERM = 15 } typealias SignalHandler = __sighandler_t func trap(signum:Signal, action:SignalHandler) { signal(signum.rawValue, action) } trap(.INT) { signal in print("Intercepted signal: \(signal)") } select(0, nil, nil, nil, nil) // Wait around for CTRL-C |
Run with swift or compile and execute using swiftc. The application will wait at the select statement. Pressing CTRL-C will generate a SIGINT and the trap routine will execute (and end the application).
To be clear, the application did not exit because the trap closure was executed. The exit occurred because flow of control transferred from the closure to after the select. Think of the line after the select as an implicit exit(0). If you rewrite this as
|
1 2 3 |
while true { select(0, nil, nil, nil, nil) } |
then the application will not exit after the signal handler executes.
Note: The Signal enumeration is but a small subset of the various signals. Check out man 7 signal for a complete list.
Pretty Printing
There’s no need to add another integer-to-string translation table to get the type of signal received. strsignal is a handy function to get a human-friendly string name for the signal:
|
1 2 3 4 5 6 7 |
trap(.INT) { signal in if let signalName = String.fromCString(strsignal(signal)) { print("Intercepted signal: \(signalName)") } else { print("Intercepted signal: \(signal)") } } |
Trailing Closures
Trailing closures are one of those syntactical goodies that make Swift a joy to program in. Your first exposure to them is probably implementing a callback function to an HTTP GET request:
|
1 2 3 4 5 |
let request = HTTPRequest(.GET, url:"http://someappserver/somerestapi/somerestresource"){ response, error in // do some stuff with the response } request.request() |
The code between the braces is actually the last parameter to the HTTPRequest class initializer. The parameter signature is likely to be (HTTPResponse, NSError) -> Void. Nothing requires you to code this in the form of the trailing closure, but it’s frequently nice to. Just remember that a trailing closure can only be used when the function to be called is the last parameter in the function signature. Those are the rules.
We of course use this feature in our routine:
|
1 2 3 4 5 6 7 8 9 |
typealias SignalHandler = __sighandler_t func trap(signum:Signal, action:SignalHandler) { signal(signum.rawValue, action) } trap(.INT) { signal in print("Intercepted signal: \(signal)") } |
The trailing closure syntax is used to specify the signal handler which must adhere to the __signalhanlder_t function signature. This signature is simply (Int32) -> Void, which is what our trailing closure is.
What about sigaction?
Truth be told, we ought to be using sigaction rather than signal. The man page says so, and everyone knows better than to argue with a man page.
The behavior of signal() varies across UNIX versions, and has also varied historically across different versions of Linux. Avoid its use: use sigaction(2) instead.
Unfortunately I haven’t figured out how to use sigaction with Swift on Linux. There are two sigaction definitions in Glibc. One is for the sigaction structure (struct sigaction) and the other is for the sigaction function. Swift can’t seem to distinguish between the two, and only the function is surfaced. Without the structure definition its difficult to call sigaction. Perhaps it is possible to write our own struct sigaction definition and somehow trick Swift into thinking it can be passed into the sigaction function. I haven’t tried, but if someone out there figures it out, leave a comment!
Hold the phone! An update on sigaction from Robert (see comments) allows us to use sigaction! We’ve taken his code (thanks Robert) and updated it a bit:
|
1 2 3 4 5 6 7 8 9 10 11 12 13 14 15 16 17 18 19 20 21 22 23 24 25 26 27 28 29 30 31 32 33 34 35 36 37 38 |
import Glibc enum Signal:Int32 { case HUP = 1 case INT = 2 case QUIT = 3 case ABRT = 6 case KILL = 9 case ALRM = 14 case TERM = 15 } typealias SigactionHandler = @convention(c)(Int32) -> Void let hupHandler:SigactionHandler = { signal in print("Received HUP signal, reread config file") } func trap(signum:Signal, action:SigactionHandler) { var sigAction = sigaction() sigAction.__sigaction_handler = unsafeBitCast(action, sigaction.__Unnamed_union___sigaction_handler.self) sigaction(signum.rawValue, &sigAction, nil) } // This method works trap(.INT) { signal in print("Received INT signal") exit(0) } // And this works of course trap(.HUP, action:hupHandler) while true { select(0, nil, nil, nil, nil) } |
Try it out!
One Last Example
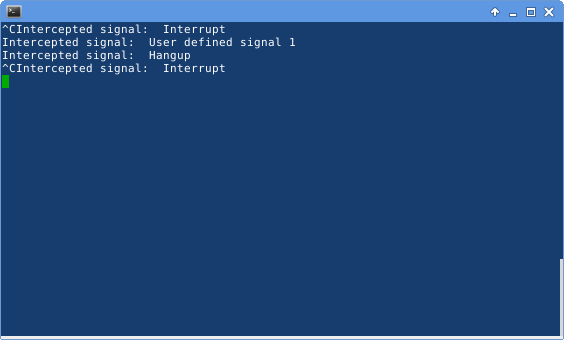
I mentioned above that the trailing closure didn’t have to be used to provide the signal handler routine. In this code we declare a single function sighandler with a (Int32) -> Void signature and then use it to trap SIGINT, SIGHUP, and SIGUSR1.
|
1 2 3 4 5 6 7 8 9 10 11 |
func sighandler(signal:Int32) { if let signalName = String.fromCString(strsignal(signal)) { print("Intercepted signal: \(signalName)") } else { print("Intercepted signal: \(signal)") } } trap(.INT, action:sighandler) trap(.USR1, action:sighandler) trap(.HUP, action:sighandler) |


You don’t need to do any tricking, “var action = sigaction()” will create a sigaction struct straight out of the box. Just tested it on Linux!
Oh, but then you run into the problem that there’s a union involved. Which are supposed to be imported correctly these days, I thought, but seem to be giving me trouble.
“unsafeBitCast” to the rescue:
It works perfectly.
Robert, thanks! I’ll test and add to the post. If you have a Twitter handle to include for attribution feel free to share, I want to make sure folks are recognized for all of the knowledge we’re building up running with Swift on Linux.
Sorry, forgot to come back and look at this! Twitter is @rothomp3, though fair warning I rarely tweet anything haha.