
Editor’s note: If you’re looking for a quick way to start working with Swift 3.0 now, try out our apt-get repository for Trusty Tahr, Wily Werewolf, and Xenial Xerus.
It’s been a little over six months since Apple released its Swift language into the open source community. Since then its various repositories have quickly climbed into the trending pages on Github. The projects are moving fast with thousands of commits a week and features being implemented on a daily basis. While one can certainly download the official SNAPSHOT release from the Swift downloads page, to stay on the bleeding edge you’ll want to learn how to compile your own release.
Getting Started
To effectively work with building Swift from the Github repositories you’re going to need a system with a decent amount of CPU and RAM. I’m personally using an 8-core desktop with 8G of RAM. In addition I suggest compiling against an SSD drive with an EXT4 filesystem. While I trust my long term data storage to ZFS with deduplication, I don’t want to compile against it.
Note: We’re using Ubuntu 15.10, and Apple also supports 14.04 and now 16.04. I haven’t even tried building on a pure Debian release or RedHat installation.
First, let’s install some prerequisites:
sudo apt-get install git cmake ninja-build clang uuid-dev libicu-dev icu-devtools libbsd-dev libedit-dev libxml2-dev libsqlite3-dev swig libpython-dev libncurses5-dev pkg-config
If you are on Ubuntu 14.04 you will also need to upgrade to Clang 3.6 and upgrade CMake to 3.4.3. Let’s start with getting clang-3.6:
sudo apt-get install clang-3.6
sudo update-alternatives --install /usr/bin/clang clang /usr/bin/clang-3.6 100
sudo update-alternatives --install /usr/bin/clang++ clang++ /usr/bin/clang++-3.6 100
Now we need to check out (sorry, clone) all of the repositories needed to “build Swift”. Fortunately the base swift repository contains an update-checkout script that will clone all of the repositories required:
# mkdir apple # You will want to do this where you have at least 4-6G of free space
# cd apple
# git clone https://github.com/apple/swift.git swift
# ./swift/utils/update-checkout --clone
Building
While not quite as bad as building the Linux kernel, compiling Swift does take a while, particularly the first time. On my system it took roughly 40 minutes to compile and package everything. Rebuilding after updating the repository contents took around 7 minutes with no changes to the source, with most of that time spent executing the post-build testcases.
We’re going to use the buildbot_linux preset for the swift/utils/build-script utility. The preset is defined in build-presets.ini. Here you can see that it goes through specific build and install stages:
|
1 2 3 4 5 6 7 8 9 10 11 12 13 |
[preset: buildbot_linux] mixin-preset=mixin_linux_installation build-subdir=buildbot_linux lldb release test validation-test foundation dash-dash install-foundation reconfigure |
Here we go! In your ~/apple directory, or whereever you checked out all of the repositories:
./swift/utils/build-script --preset=buildbot_linux_1510 install_destdir=/tmp/install installable_package=/tmp/swift.tar.gz
You’ll notice our exact preset was buildbot_linux_1510, which for the time being is an alias to buildbot_linux. If you are building on an Ubuntu 16.04 system you can use builtbot_linux_1604. If you prefer you can also choose a different install_destdir and installable_package.
The output of the packaging step is a standard /usr/ directory layout with:
/usr/bin |
The swift compiler, lldb debugger, and various other tools get put here. |
/usr/include |
For now this contains only lldb include headers. |
/usr/lib |
All of the libraries, shared and static, that make up the Swift environment are here. For example, libFoundation.so, libswiftCore.so, etc. |
/usr/local |
The packaging builtbot creates this directory but nothing lies within. |
/usr/share |
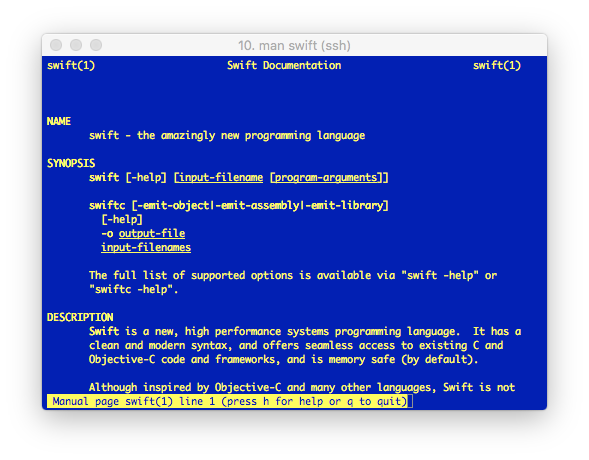
For now a single man page is included! Go ahead, try it out with man swift. |
To test out your new Swift compiler:
cd /tmp/install
./usr/bin/swift --version
Swift version 3.0-dev (LLVM 7bae82deaa, Clang 4b3278bec5, Swift 0cc49187bb)
Target: x86_64-unknown-linux-gnu
The 3.0-dev information is baked into the source code in Version.cpp by gleaning the information from CMakeLists.txt. The hex strings for LLVM, Clang, and Swift are, you guessed it, the git hash that the binary was built from.

Updating and Rebuilding
To keep current with the latest submissions to the repositories you can use the update-checkout helper script:
./swift/utils/update-checkout --all
After updating to rebuild (without cleaning) use the previous command:
./swift/utils/build-script --preset=buildbot_linux_1510 install_destdir=/tmp/install installable_package=/tmp/swift.tar.gz
To run a distclean of sorts just remove the build/buildbot_linux directory that was created in your top-level directory, or you can selectively remove subdirectories within buildbot_linux to retrigger a build of that component. For example, if we want to clean out the artifacts for Foundation and the Swift Package Manager and then rebuild:
rm -rf build/buildbot_linux/foundation-linux-x86_64 build/buildbot_linux/swiftpm-linux-x86_64
./swift/utils/build-script --preset=buildbot_linux_1404 install_destdir=/tmp/install installable_package=/tmp/swift.tar.gz
Using
I am a fan of using the /opt/vendor directory structure for vendor packages. Once the build is complete you can use rsync to get it placed in an appropriate directory.
sudo rsync -a /tmp/install/ /opt/swift/swift-3.0/
Note: If you aren’t familiar with rsync be aware that trailing slashes are important!
Update your PATH to include /opt/swift/swift-3.0/usr/bin and you should be good to go! Try out your own personal Swift build with the Swift Package Manager.
Get the Code
We’ve included some helper scripts on Github.
# git clone https://github.com/iachievedit/package-swift
Start with running get.sh to clone all of the required Github repositories. Then for your first build, run package.sh and go watch an episode Walking Dead or Game of Thrones. When you get back you should have an install directory with your own version of Swift.
To refresh your sources run update.sh and then rebuild with package.sh.


