Howdy!
In this post you’re going to learn how to download and install VirtualBox on your Mac to aid the creation of Linux servers to do web service development. Often iOS applications require the need to know how to develop web services, as much of the functionality of a given app is actually “in the cloud”. If you’ve developed any Facebook or Twitter applications, you’re already familiar with the concept of using a “service in the cloud”. This tutorial is part of a series designed to bootstrap you into developing your own webservices.
First, go grab VirtualBox! You can find a link to download a Mac DMG here. Double-click the DMG and you’ll be presented with a window prompting you to double-click on the VirtualBox.pkg installer.
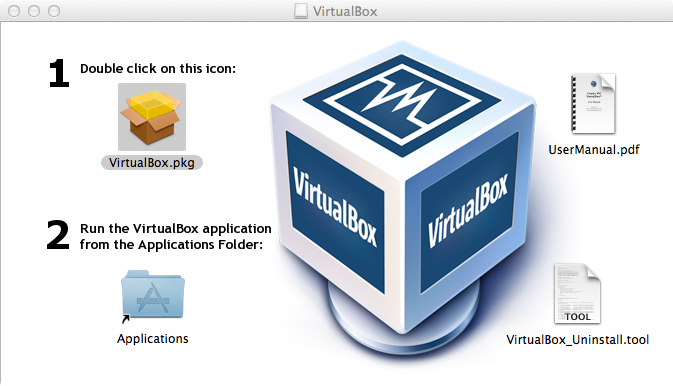
Follow each of the prompts presented to you on the screen. Once the installation is declared successful, go to your applications folder and launch VirtualBox.
Now that we have VirtualBox running, we need an OS to install! Our examples will use Ubuntu 12.04 LTS, which you will need to download from here. We’re going to use the server installer, as we don’t need a GUI. To be precise, we’ll use the 64-bit Ubuntu 12.04 Server. Clicking on this link will download an ISO image which we will give to VirtualBox to create us a Linux server on which we’ll host web services development!
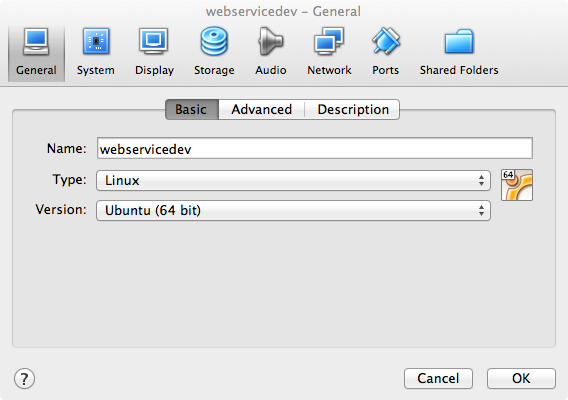
In the Oracle VM VirtualBox Manager screen, click New. You’ll be prompted to identify the OS you are going to install and give it a name. We’ll use webservicedev. For Type, choose Linux, and for Version choose Ubuntu (64-bit).

You’ll then be prompted to select a memory size, for the VM, the default of 512M is sufficient for our purposes. When prompted for the hard drive settings, choose Create a virtual hard drive now. When prompted for the hard drive file type, choose VDI (Virtual Disk Image). Choose Dynamically allocated when prompted, and accept the defaults for the File location and size (8GB).
You will now see your system configured and ready to go. You need to make one adjustment here, and that is setting the initial boot device to the Ubuntu ISO image you downloaded. Select the webservicedev machine in the left-hand menu of the Oracle VM VirtualBox Manager and right click and choose Settings. You’ll be presented with a menu of settings like this:
Click the Storage icon to see:
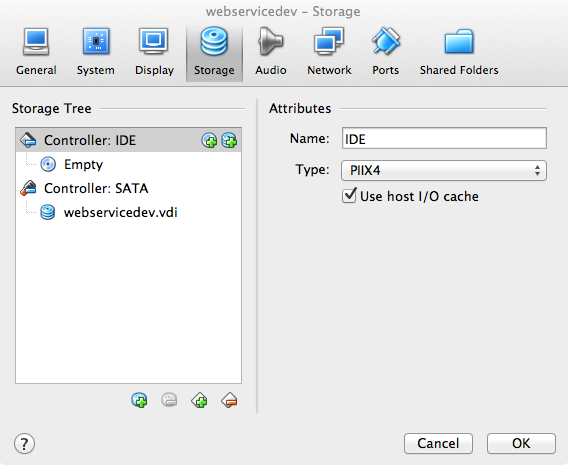
Click on the CD Entry that says Empty, and then on the right-hand side of the window, click on the little CD next to the drop-down menu for CD/DVD Drive. Clicking on the little CD icon will give you the option to Choose a virtual CD/DVD disk file. Select this option and use the Finder navigator to where you saved the file ubuntu-12.04.2-server-amd64.iso (most likely in the Downloads folder).
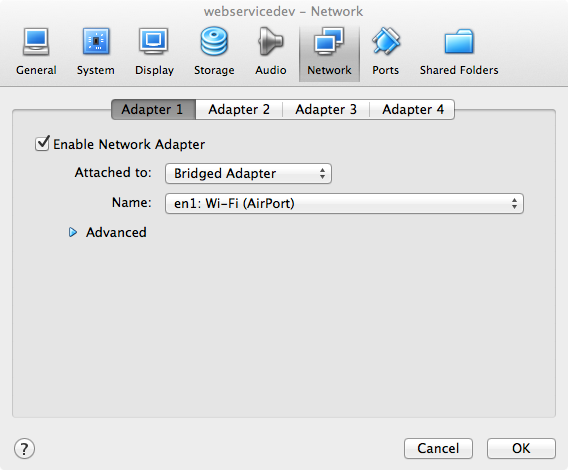
One last thing, click on the Network icon at the top of webservicedev settings window. Change the value ‘NAT’ under Adapter 1 to Bridged Adapter and under name, select whichever network adapter your Mac is connected to your router on. In our example, we use Wi-Fi as the only network connection for the Mac.
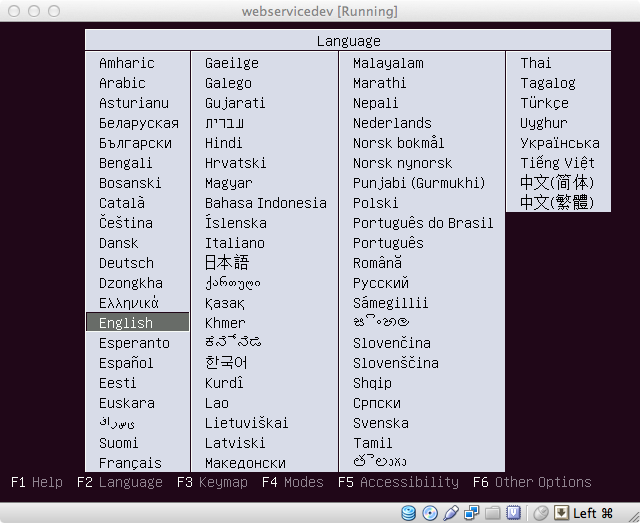
Now, click on OK to dismiss the Settings window and boot your VM! Select webservicedev in the menu and click on the big green arrow that says Start. The Ubuntu installer should boot and you can walk yourself through the installer. Our example will be using English, but make selections appropriate for you!
After selecting the Language, choose Install Ubuntu Server and then follow the prompts and make the selections appropriate for your language, keyboard layout, etc. Here are the values we used when installing:
- Hostname: webservicedev
- Full name for the new user: webservice
- Username for the account: webservice
- Encrypt your home directory? No
- Timezone: UTC
- Guided Partitioning: use entire disk
Continue the prompts to partition the disk, if you need help or have questions about the Ubuntu installer there are plenty of guides on the web. This one you might find to be helpful. In general for development systems on your local machine, you don’t need fancy partitioning. If you find yourself as the server administrator for production servers, you might bone up on advanced partitioning schemes.
When prompted about an HTTP proxy, you most likely can leave it blank, unless you really need one (in which case you should be familiar with filling out this kind of information).
When prompted about managing upgrades and updates, choose No automatic updates (this is our personal preference).
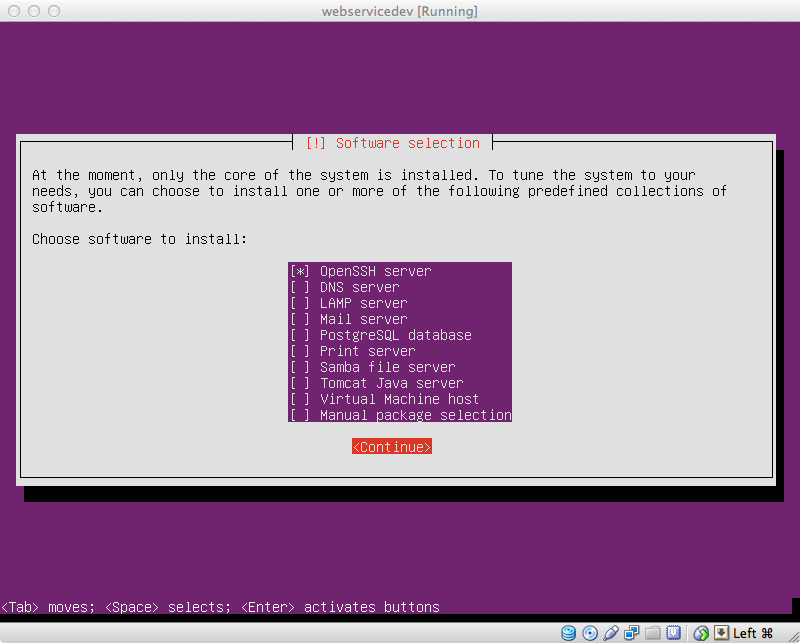
When prompted, you will definitely want to install OpenSSH server, and you can skip the rest for now. There are number of packages we’ll install after the system initially boots.
Finally, Install the GRUB boot loader to the master boot record should be Yes. Press ENTER when you see the Installation is complete screen. Congratulations, your new VM should now be booting and momentarily you will see something similar to this:
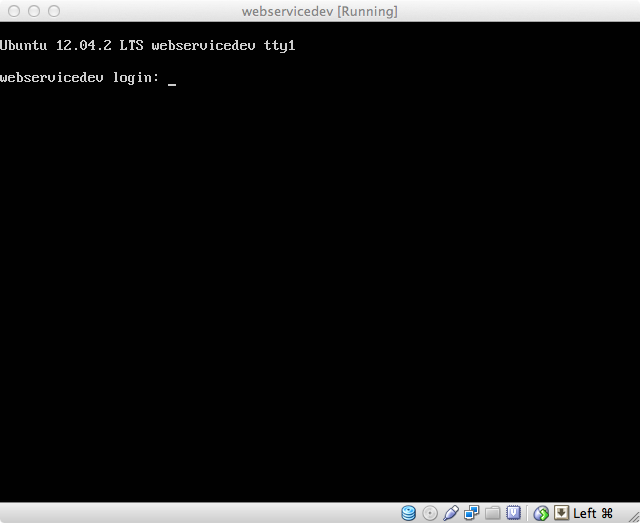
Log in with the username and password you selected. We don’t like working in the VirtualBox screen, so we run ifconfig to find the IP address assigned to the VM, and then ssh into it with iTerm2.
Now, this VM is functional, but we’re going to be doing some web service hosting on it, and to do that we’re going to need quite a few software packages. Let’s outline what we’ll be installing and why first
- Ruby – because our web service is written in Ruby
- Bundler – because it is the way to manage Ruby gems in a web application
- Passenger – because we like the Passenger module for running Ruby code in a web server
- Nginx – because we like to run Nginx as our web server
- GCC and make – because they are required to build modules and libraries needed by the aforementioned
- Other development packages required by Passenger
- Git – because we’ll need to check our code out onto the web server, and we use github.com
Well, let’s get started. You can painstakingly type sudo before each command, but we know a lot of these commands are going to require sudo, so we’ll just switch now.
|
1 2 3 4 |
Last login: Mon Feb 25 03:34:12 2013 webservice@webservicedev:~$ sudo su [sudo] password for webservice: root@webservicedev:/home/webservice# |
Let’s get Ruby going first.
|
1 2 3 4 5 6 7 8 9 10 11 12 13 14 |
root@webservicedev:/home/webservice# apt-get install ruby1.9.1 Reading package lists... Done Building dependency tree Reading state information... Done The following extra packages will be installed: libruby1.9.1 libyaml-0-2 Suggested packages: ruby1.9.1-examples ri1.9.1 graphviz ruby1.9.1-dev The following NEW packages will be installed: libruby1.9.1 libyaml-0-2 ruby1.9.1 0 upgraded, 3 newly installed, 0 to remove and 5 not upgraded. Need to get 4,196 kB of archives. After this operation, 12.7 MB of additional disk space will be used. Do you want to continue [Y/n]? |
Select Y and watch the apt-get go and fetch everything it needs to install Ruby 1.9.3 (for an explanation as why Ruby 1.9.3 is installed when running apt-get install ruby1.9.1 see here).
Now, install make and g++, and this time we’ll use the -y option to apt-get to speed things up. We’ve also included make and g++ on the same line.
root@webservicedev:/home/webservice# apt-get -y install make g++
When we install Nginx it will require a number of dependencies, so let’s get them out of the way by installing ruby1.9.1-dev, zlib1g-dev, libssl-dev, and libcurl4-openssl-dev.
root@webservicedev:/home/webservice# apt-get -y install ruby1.9.1-dev zlib1g-dev libssl-dev libcurl4-openssl-dev
Now, install the passenger gem with gem install passenger . You should see something similar to:
|
1 2 3 4 5 6 7 8 9 10 11 12 13 14 15 16 17 18 19 20 21 22 23 |
root@webservicedev:/home/webservice# gem install passenger Fetching: rake-10.0.3.gem (100%) Fetching: fastthread-1.0.7.gem (100%) Building native extensions. This could take a while... Fetching: daemon_controller-1.1.1.gem (100%) Fetching: rack-1.5.2.gem (100%) Fetching: passenger-3.0.19.gem (100%) Successfully installed rake-10.0.3 Successfully installed fastthread-1.0.7 Successfully installed daemon_controller-1.1.1 Successfully installed rack-1.5.2 Successfully installed passenger-3.0.19 5 gems installed Installing ri documentation for rake-10.0.3... Installing ri documentation for fastthread-1.0.7... Installing ri documentation for daemon_controller-1.1.1... Installing ri documentation for rack-1.5.2... Installing ri documentation for passenger-3.0.19... Installing RDoc documentation for rake-10.0.3... Installing RDoc documentation for fastthread-1.0.7... Installing RDoc documentation for daemon_controller-1.1.1... Installing RDoc documentation for rack-1.5.2... Installing RDoc documentation for passenger-3.0.19... |
And before we install Nginx, install bundler too.
|
1 2 3 4 5 6 |
root@webservicedev:/home/webservice# gem install bundler Fetching: bundler-1.2.4.gem (100%) Successfully installed bundler-1.2.4 1 gem installed Installing ri documentation for bundler-1.2.4... Installing RDoc documentation for bundler-1.2.4... |
This one will take a while, but if you’ve followed all the steps up until now, run passenger-install-nginx-module. You will prompted to Press Enter to continue so press Enter (to continue!). You want to see
|
1 2 3 4 5 6 7 8 9 10 11 12 13 |
Checking for required software... * GNU C++ compiler... found at /usr/bin/g++ * The 'make' tool... found at /usr/bin/make * A download tool like 'wget' or 'curl'... found at /usr/bin/wget * Ruby development headers... found * OpenSSL support for Ruby... found * RubyGems... found * Rake... found at /usr/local/bin/rake * rack... found * Curl development headers with SSL support... found * OpenSSL development headers... found * Zlib development headers... found |
followed by Enter your choice (1 or 2) or press Ctrl-C to abort: Enter 1. The automated installer will automatically download all of the source necessary to build and install Nginx, a high performance web server. Select the defaults when prompted.
If all goes well (and why shouldn’t it, right?), you should see
|
1 2 3 4 5 6 7 8 9 10 11 12 13 14 15 16 17 18 19 20 |
Nginx with Passenger support was successfully installed. The Nginx configuration file (/opt/nginx/conf/nginx.conf) must contain the correct configuration options in order for Phusion Passenger to function correctly. This installer has already modified the configuration file for you! The following configuration snippet was inserted: http { ... passenger_root /var/lib/gems/1.9.1/gems/passenger-3.0.19; passenger_ruby /usr/bin/ruby1.9.1; ... } After you start Nginx, you are ready to deploy any number of Ruby on Rails applications on Nginx. Press ENTER to continue. |
That’s actually the end of this tutorial, as its sort of a small step towards getting a fully functioning web services web server running. If you really want to try things out now, go ahead and install git-core.
root@webservicedev:/home/webservice# apt-get install git-core
Then, let’s create a directory to hold our webservice code:
mkdir -p /web/apps/webservice

chown webservice.webservice -R /web/
If you are still running around as root, type exit to go back to the webservice user. Continue and check out the code:
|
1 2 3 4 5 6 7 |
cd /web/apps/webservice webservice@webservicedev:/web/apps/webservice$ git clone https://github.com/iachievedit/secureWebService Cloning into 'secureWebService'... remote: Counting objects: 23, done. remote: Compressing objects: 100% (19/19), done. remote: Total 23 (delta 8), reused 19 (delta 4) Unpacking objects: 100% (23/23), done. |
Prepare the area to run as a Passenger application by creating a public directory and then execute bundle install:
|
1 2 3 4 5 6 7 8 9 10 11 |
webservice@webservicedev:/web/apps/webservice/secureWebService$ mkdir public webservice@webservicedev:/web/apps/webservice/secureWebService$ bundle install Fetching gem metadata from https://rubygems.org/.......... Fetching gem metadata from https://rubygems.org/.. Installing json (1.7.5) with native extensions Using rack (1.5.2) Installing rack-protection (1.3.2) Installing tilt (1.3.3) Installing sinatra (1.3.4) Using bundler (1.2.4) Your bundle is complete! Use `bundle show [gemname]` to see where a bundled gem is installed. |
Now, edit your nginx.conf (found in /opt/nginx/conf/, and you will need to use sudo vi) to look exactly like this (unless you know what you are doing, use the default passenger_root and passenger_ruby directives).
|
1 2 3 4 5 6 7 8 9 10 11 12 13 14 15 16 17 18 19 20 21 22 23 24 |
worker_processes 1; events { worker_connections 1024; } http { passenger_root /var/lib/gems/1.9.1/gems/passenger-3.0.19; passenger_ruby /usr/bin/ruby1.9.1; include mime.types; default_type application/octet-stream; sendfile on; keepalive_timeout 65; server { listen 80; server_name webservicedev; passenger_enabled on; root /web/apps/webservice/secureWebService/public; } } |
Start the nginx process with sudo /opt/nginx/sbin/nginx and then point your browser to the web service, for example, http://192.168.0.114/resource/100 for us displays:
{"resource":"100","status":"OK","values":{"key1":"value1","key2":"value2"}}
Now, for our disclaimer: this is not the way we will be deploying our web service application to the web server! We’ll be using Capistrano to deploy our applications from the Mac onto the web server. Stay tuned for that blog post.