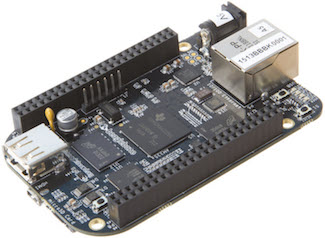
I recently came across an issue with the NSThread implementation in open source Swift Foundation. I wouldn’t have ever found the issue if it hadn’t been for trying to run this code on a Raspberry Pi 3:
|
1 2 3 4 5 6 7 8 9 10 11 12 13 14 15 |
import Foundation import Glibc var counter = 0 while true { sleep(2) counter = counter + 1 let t = Thread(){ print("STARTED:\(counter)") sleep(1) print("EXIT:\(counter)") } print("START:\(counter)") t.start() } |
Our expectation here is that we will be creating and destroying a thread every second. Unfortunately, after approximately 230 threads the system resources had been exhausted and no more threads would actually start. In the end, as you can see from SR-1908, the solution was to initialize threads with system scope and a state of detached:
|
1 2 3 4 5 6 7 8 |
public init(_ main: (Void) -> Void) { _main = main let _ = withUnsafeMutablePointer(&_attr) { attr in pthread_attr_init(attr) pthread_attr_setscope(attr, Int32(PTHREAD_SCOPE_SYSTEM)) pthread_attr_setdetachstate(attr, Int32(PTHREAD_CREATE_DETACHED)) } } |
Philippe Hausler proposed the solution in SR-1908, and since I had a Raspberry Pi 3 to test it out on I took on the task of implementing and testing it.
Building Only Foundation
If you read the Getting Started documentation for Open Source Foundation it’s pretty clear that you need to first build Swift, clang, and llvm. If I were working on a tricked out server with plenty of CPU and fast disk, I wouldn’t mind. On a Raspberry Pi 3 though, as much of an improvement it is over its older siblings, it is still a little slow. I could also look into cross-compiling Swift, but haven’t yet rustled up the time to figure that out (and if you’ve ever worked with cross-compile environments you know it takes a good amount of time to get set up).
What we need is the ability to take advantage of an existing build tree and compile Foundation by itself. It turns out you can, otherwise, we wouldn’t have a blog post on this now would we?
Here’s what you’re going to need to do this (regardless of whether you run this on an x86 server or an ARM computer like a BeagleBone or Raspberry Pi):
- a fully built
swiftc, typically found inbuild/buildbot_linux/swift-linux-armv7/bin - a fully built
swift, also in thebuild/buildbot_linux/swift-linux-armv7/bindirectory - a fully built
clang(the one built from the open source repositories), found inbuild/buildbot_linux/llvm-linux-armv7/bindirectory
I’m looking to provide a “toolchain” of sorts with all of these already compiled, but for now you’ll have to build your own first. Then you will be able to build Foundation on its own.
Now, let’s look at how you use this to test something out on Foundation. Notice that we are cloning our own fork of swift-corelibs-foundation. This is important if you’re planning on issuing pull requests back into the upstream repository (i.e., Apple’s repository).
# git clone https://github.com/iachievedit/swift-corelibs-foundation
# export PREBUILT_ROOT=/root/workspace/Swift-3.0-Pi3-ARM-Incremental/build/buildbot_linux/
# SWIFTC=$PREBUILT_ROOT/swift-linux-armv7/bin/swiftc \
CLANG=$PREBUILT_ROOT/llvm-linux-armv7/bin/clang      \
SWIFT=$PREBUILT_ROOT/swift-linux-armv7/bin/swift     \
SDKROOT=$PREBUILT_ROOT/swift-linux-armv7             \
BUILD_DIR=build ./configure Debug
# /usr/bin/ninja
...
[290/290] Link: build/Foundation/libFoundation.so
First, we set an environment variable PREBUILT_ROOT to where our prebuilt Swift and associated tools are. This is used in the next step which, if you strip away the environment variables is ./configure Debug (you can use Release here as well). But, we need the environment variables SWIFTC, CLANG, SWIFT, and SDKROOT to point the configure script to our “toolchain.” Finally, the BUILD_DIR environment variable sets where all of the intermediate artifacts and final output (libFoundation.so) will be placed.
Note: I shouldn’t have to say this but somtimes you’d be surprised by what gets left in the comments. Your PREBUILT_ROOT is the location of your preexisting toolchain. Don’t expect to find anything on your system at /root/workspace/Swift-3.0-Pi3-ARM-Incremental!
Finally, /usr/bin/ninja runs our build. Once complete you should have a libFoundation.so shared library in your build/Foundation/ directory. To test it with an existing installation of Swift just copy libFoundation.so over to $YOUR_SWIFT_ROOT/usr/lib/swift/linux/libFoundation.so.
Running testcases
You can also run the Foundation test suite by adding a -DXCTEST_BUILD_DIR parameter to ./configure
# export PREBUILT_ROOT=/root/workspace/Swift-3.0-Pi3-ARM-Incremental/build/buildbot_linux/
# SWIFTC=$PREBUILT_ROOT/swift-linux-armv7/bin/swiftc \
CLANG=$PREBUILT_ROOT/llvm-linux-armv7/bin/clang      \
SWIFT=$PREBUILT_ROOT/swift-linux-armv7/bin/swift     \
SDKROOT=$PREBUILT_ROOT/swift-linux-armv7             \
BUILD_DIR=build ./configure Debug                    \
-DXCTEST_BUILD_DIR=$PREBUILT_ROOT/xctest-linux-armv7
# /usr/bin/ninja test
[4/4] Building Tests
**** RUNNING TESTS ****
execute:
LD_LIBRARY_PATH= build/TestFoundation/TestFoundation
**** DEBUGGING TESTS ****
execute:
LD_LIBRARY_PATH= lldb build/TestFoundation/TestFoundation
Running the tests requires LD_LIBRARY_PATH to be supplied with two paths: one to the libXCTest.so shared library, as well as the path to the “library under test”. We accomplish this as follows, assuming that our libFoundation.so is in ./build/Foundation, which would it would be if we were following the steps above.
# LD_LIBRARY_PATH=./build/Foundation:$PREBUILT_ROOT/xctest-linux-armv7 ./build/TestFoundation/TestFoundation
...
Test Suite 'All tests' passed at 03:16:45.315
     Executed 483 tests, with 0 failures (0 unexpected) in 37.621 (37.621) seconds
Closing Thoughts
I need to stress here that to use this technique you do need a preexisting “build toolchain” that has a Swift, clang, and llvm. Moreover, the further time passes from when your toolchain was last built to when you try to build Foundation on its own, the higher the risk that your Foundation relies on language features that weren’t present when you built your toolchain. However, if you decide to embark on working with Foundation, build your full Swift toolchain first and save the build directory to employ the technique described above.
Good luck!


