I frequently use Xcode schemes and configurations to manage building iPhone applications for specific environments. For example, let’s say you’re integrating with an API from another team, and they’ve set up two instances of the API: staging and production. Furthermore, you want to have two sets of builds for those environments: debug and release. All of this can be accomplished with Xcode and Swift, with details outlined in a previous blog post.
In this post I’ll show you how to extend this paradigm to work with an Apple Watch target that you’ve added to your project. We’ll start with an application that is already configured to support two schemes: debug and release, where the debug scheme enables logging. Download the starter project watchschemes. To ensure things are working properly, download the zip file and open the watchschemes.xcodeproj project, and then run the Debug Application scheme. You should get a nice log in the console:
|
1 2 3 |
2015-04-16 21:47:30.056 [Info] : watchschemes Version: 1.0 Build: 1 PID: 51960 2015-04-16 21:47:30.056 [Info] : XCGLogger Version: 1.8.1 - LogLevel: Debug 2015-04-16 21:47:30.059 [Debug] [AppDelegate.swift:27] application(_:didFinishLaunchingWithOptions:): ENTRY |
Before we add the Apple Watch target, note our two files that facilitate logging: XCGLogger.swift and LogUtils.swift. They are currently grouped under Supporting Files of our watchschemes folder. When we add the Apple Watch target we’ll reorganize these files to highlight the fact that they are shared between the iPhone application and watch extension. If you haven’t had the pleasure of working with XCGLogger, see our post on using XCGLogger instead of Lumberjack for your Swift projects.
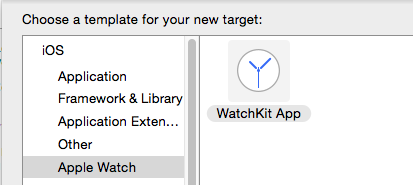
Now, let’s add our Watch target. Go to Xcode File – New – Target and select the Apple Watch “WatchKit App” template. Uncheck Include Notification Scene as we won’t be creating one.
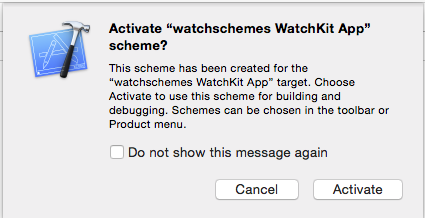
You will notice that Xcode has created a new scheme titled watcheschemes WatchKit App. Xcode may ask if you want to activate that new scheme:
Click Activate.
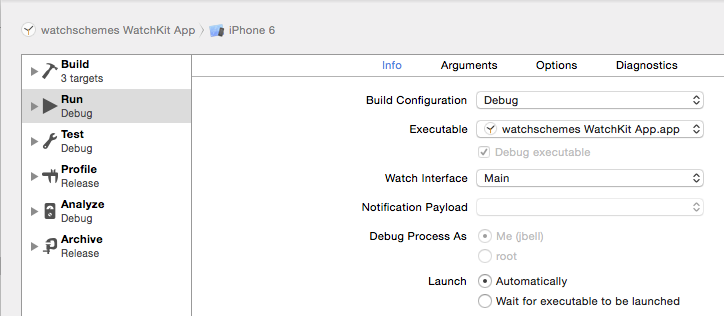
You will also notice if you edit the scheme you will find that the Run action is associated with the Debug build configuration.
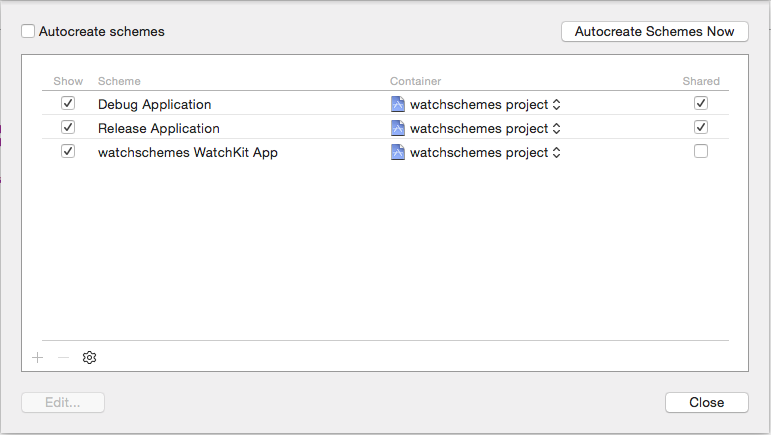
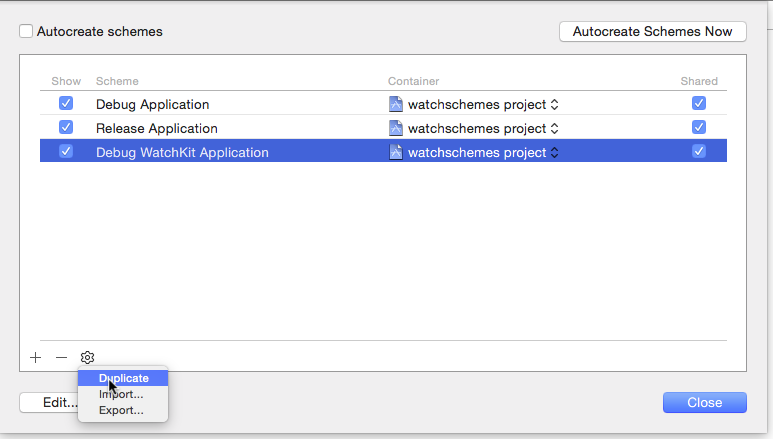
What we would like is to have two schemes for our WatchKit App, similar to the two schemes we have for the iPhone application. Let’s do that then by going to the Manage Schemes page. To get there, select the Scheme in Xcode and go down to Manage Schemes.
You should see the three schemes in the project:
The first thing we’ll do is rename the default WatchKit application scheme to Debug WatchKit Application and mark it as a shared scheme (sharing the scheme allows for multiple developers to share the scheme in their workflow, allow them to use all of the build configuration defines, optimizations, etc.). Then, we will duplicate that scheme and rename it to Release WatchKit Application.
When duplicating the scheme, rename it to Release WatchKit Application and change the build configuration for the Run action from Debug to Release. After duplicating the scheme mark the scheme as Shared.
Now that we have a Debug and Release WatchKit Application, let’s instrument logging into the WatchKit extension such that Debug has meaning. Open the InterfaceController.swift file (in the extension group) and ensure it looks like this:
|
1 2 3 4 5 6 7 8 9 10 11 12 13 14 15 16 17 18 19 20 21 22 23 24 25 26 27 28 29 30 31 32 33 34 |
import WatchKit import Foundation let log = XCGLogger.defaultInstance() class InterfaceController: WKInterfaceController { override func awakeWithContext(context: AnyObject?) { super.awakeWithContext(context) #if Debug log.setup(logLevel: .Debug, showLogLevel: true, showFileNames: true, showLineNumbers: true, writeToFile: nil) #else log.setup(logLevel: .Severe, showLogLevel: true, showFileNames: true, showLineNumbers: true, writeToFile: nil) #endif ENTRY_LOG() EXIT_LOG() } override func willActivate() { ENTRY_LOG() super.willActivate() EXIT_LOG() } override func didDeactivate() { ENTRY_LOG() super.didDeactivate() EXIT_LOG() } } |
Out of the box, with no changes to the extension target, this code will not compile. The WatchKit extension has no knowledge of the XCGLogger.swift and LogUtils.swift code that is a part of the iOS application. So let’s add them.
Tip: If you interested in how the ENTRY_LOG() and EXIT_LOG() routines work, see the LogUtils.swift file.
Go to the watchschemes WatchKit Extension target’s Build Phases pane and under the Compile Sources section add both XCGLogger.swift and LogUtils.swift. This simply instructs Xcode to consult these files when compiling the WatchKit extension.
Before adding the two Swift files you should see only the InterfaceController.swift file as a member of the Compile Sources list:
After adding you should have 3 files:
Although we’ve added our logging files to the extension target, and we’ve specified the Debug and Release build configuration for the two schemes, one still must configure the build configurations for the extension target. To put another way: Xcode does not copy the build configuration flags and settings from the iOS target to the extension target when it is created. You can verify this by looking at the Swift Compiler – Custom Flags for the WatchKit extension. Whereas our original application has -DDebug set for the Debug build configuration, the extension target does not. You should keep this in mind when creating your first Apple Watch target: if you have compile-time flags configured for your iOS build configurations, you’ll need to reproduce them in your extension target flags. This is what we have done here:
Once your build configuration flags have have been set you should be able to Run either the Debug or Release WatchKit Application. For instant gratification, select the Debug Watchkit Application scheme and run. You should see
|
1 2 3 4 5 6 |
2015-04-16 21:19:49.364 [Info] : watchschemes WatchKit Extension Version: 1.0 Build: 1.0 PID: 51664 2015-04-16 21:19:49.364 [Info] : XCGLogger Version: 1.8.1 - LogLevel: Debug 2015-04-16 21:19:49.372 [Debug] [InterfaceController.swift:24] awakeWithContext: ENTRY 2015-04-16 21:19:49.373 [Debug] [InterfaceController.swift:26] awakeWithContext: EXIT 2015-04-16 21:19:49.374 [Debug] [InterfaceController.swift:30] willActivate(): ENTRY 2015-04-16 21:19:49.374 [Debug] [InterfaceController.swift:32] willActivate(): EXIT |
in the console log for the Debug WatchKit Application scheme.
As you continue development of your WatchKit application you can use the debug configuration. Once you are ready to run the release version with no logging, switch over to the Release WatchKit Application scheme you created.
Tip: With the two build configurations and schemes you can build either a WatchKit application that includes debug logging, or one that doesn’t. I personally prefer to have additional configurations and schemes for targeting various installations of APIs or other backend services; the approach outlined above can be extended to accomplish this so you can support variations such as Debug Staging or Release Beta.
Tip: Don’t forget your Archive scheme actions! I frequently upload archive builds to either TestFlight or TestFairy that have logging instrumentation, test API keys, or are utilizing staging servers. You will want to ensure the Archive action for your scheme has the correct build configuration set.
Organizing Common Swift Files
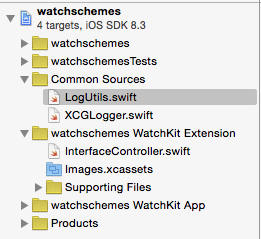
As mentioned above, our XCGLogger.swift and LogUtils.swift files are utilized by both the iOS application and WatchKit extension. To facilitate making this explicitly obvious in the project, I’ve started to add a Common Sources group to my Xcode projects and placing the shared files there. In this project this looks like:
Getting the Code
The final version of the code for this tutorial is on the watchschemes branch of the BitBucket repository. To download a copy, grab this zip.
