In some ways Apple signaled what it sees as the future for home automation when it introduced HomeKit with support for 802.11 (Wifi) and Bluetooth Low Energy (also referred to as BTLE or Bluetooth Smart) as transport protocols. Notably absent were both Z-Wave and Zigbee. Sure, Apple provided for the implementation of a “bridge” device to these existing protocols, but every product announcement since then touting HomeKit support has been a Wifi or BTLE device. Don’t take my word for it, browse through this article outlining the devices showcased at CES this year. A brief lineup:
- Elgato’s Eve Line (Bluetooth Low Energy)
- Schlage Sense (Bluetooth Low Energy)
- iDevices Switch (BTLE and Wifi)
and more. Neither Z-Wave nor Zigbee is mentioned, which is not to say that either protocol or the the thousands of devices that are out there will simply go away, only that it’s clear Apple sees BTLE and Wifi as the future for home automation control. Whether that is true remains to be seen.
But this article isn’t about HomeKit, it’s about Bluetooth Low Energy itself and how to quickly integrate an Arduino-powered Adafruit BTLE board with your iPhone, all using an Arduino Xcode project. So let’s get started.
In our previous post we covered how to create an Arduino sketch using Xcode and the embedXcode project. The outcome of that process was a simple Arduino application that blinked two LEDs back and forth, and while cool, not exactly ground breaking. Let’s take it to the next level and integrate an Adafruit nrf8001 BTLE Breakout board with the Arduino and talk to it with our iPhone. Moreover, we’ll do all of this with our favorite IDE (well, mine at least), Xcode.
Before we get started, you’ll need to have the following on hand:
- Arduino Uno board and USB programming cable
- Breadboard and 8 male-to-male jumper cables
- Adafruit nrf8001 BTLE Breakout board
- Arduino application installed on your Mac
- embedXcode installed on your Mac
- an iPhone and access to the AppStore
For the last two items, see our previous post for instructions on installing.
The nrf8001 breakout board does not come out of the box with the header pins soldered on, so you’ll need to do that step. Luckily the instructions are provided by Kevin Townsend’s excellent nrf8001 article.
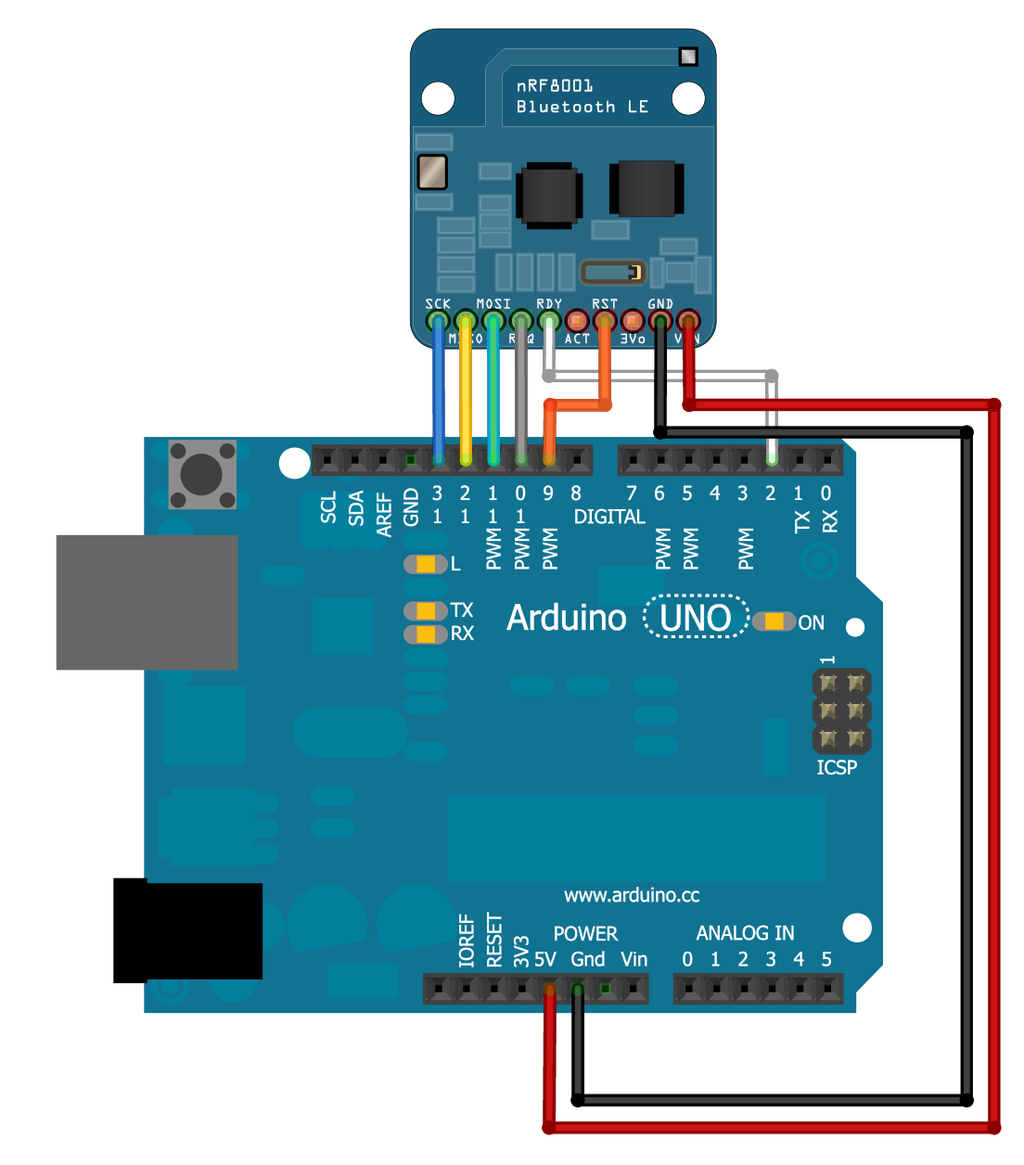
Assuming you the breakout board soldered and in your breadboard, wire it per the instructions found on Adafruit:
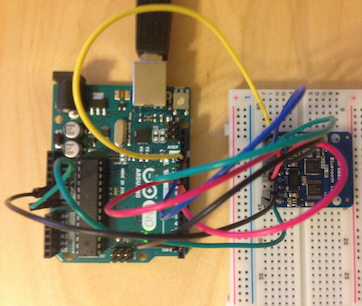
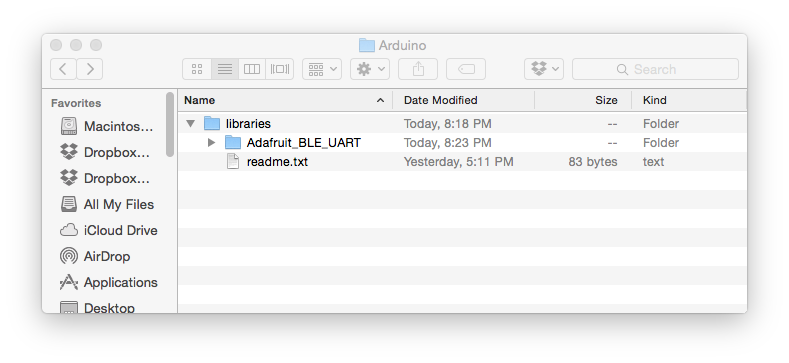
Once the wiring is completed, we need to install the Adafruit BLE UART software into our Mac’s Arduino user library folder. There is a distinction between system libraries and user libraries that will become apparent in a moment.
To install the Adafruit BLE UART software as a user library click on this download link. A folder named Adafruit_nRF8001-master will be created in your Downloads folder. Rename this folder to Adafruit_BLE_UART and then drag-and-drop it into your ~/Documents/Arduino/libraries folder:
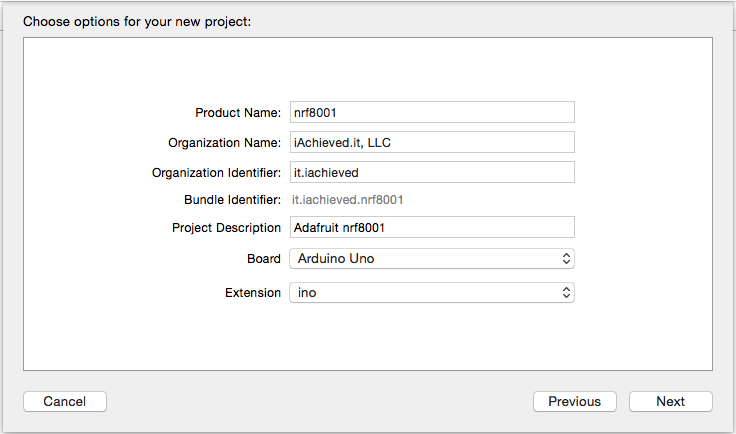
Now, let’s create our Xcode project. Open Xcode and use File – New – Project to create a new embedXcode Sketch. We’ve named our project nrf8001 and targeted the Arduino Uno board.
To walk this through in stages, open the nrf8001.ino file in your project and delete its contents and then add following to it:
|
1 2 3 4 5 6 7 8 9 10 11 12 13 14 15 16 17 18 19 20 21 22 23 24 25 26 27 28 29 30 31 32 33 34 35 36 37 38 39 40 41 42 43 44 45 46 47 48 49 50 51 52 53 54 55 56 57 58 59 60 61 62 63 64 65 66 67 68 69 70 71 72 73 74 75 76 77 78 79 80 81 82 83 84 85 86 87 88 89 90 91 92 93 94 95 96 97 98 99 100 101 102 103 |
/********************************************************************* This is an example for our nRF8001 Bluetooth Low Energy Breakout Pick one up today in the adafruit shop! ------> http://www.adafruit.com/products/1697 Adafruit invests time and resources providing this open source code, please support Adafruit and open-source hardware by purchasing products from Adafruit! Written by Kevin Townsend/KTOWN for Adafruit Industries. MIT license, check LICENSE for more information All text above, and the splash screen below must be included in any redistribution *********************************************************************/ // This version uses the internal data queing so you can treat it like Serial (kinda)! #include <SPI.h> #include "Adafruit_BLE_UART.h" // Connect CLK/MISO/MOSI to hardware SPI // e.g. On UNO & compatible: CLK = 13, MISO = 12, MOSI = 11 #define ADAFRUITBLE_REQ 10 #define ADAFRUITBLE_RDY 2 // This should be an interrupt pin, on Uno thats #2 or #3 #define ADAFRUITBLE_RST 9 Adafruit_BLE_UART BTLEserial = Adafruit_BLE_UART(ADAFRUITBLE_REQ, ADAFRUITBLE_RDY, ADAFRUITBLE_RST); /**************************************************************************/ /*! Configure the Arduino and start advertising with the radio */ /**************************************************************************/ void setup(void) { Serial.begin(9600); while(!Serial); // Leonardo/Micro should wait for serial init Serial.println(F("Adafruit Bluefruit Low Energy nRF8001 Print echo demo")); // BTLEserial.setDeviceName("NEWNAME"); /* 7 characters max! */ BTLEserial.begin(); } /**************************************************************************/ /*! Constantly checks for new events on the nRF8001 */ /**************************************************************************/ aci_evt_opcode_t laststatus = ACI_EVT_DISCONNECTED; void loop() { // Tell the nRF8001 to do whatever it should be working on. BTLEserial.pollACI(); // Ask what is our current status aci_evt_opcode_t status = BTLEserial.getState(); // If the status changed.... if (status != laststatus) { // print it out! if (status == ACI_EVT_DEVICE_STARTED) { Serial.println(F("* Advertising started")); } if (status == ACI_EVT_CONNECTED) { Serial.println(F("* Connected!")); } if (status == ACI_EVT_DISCONNECTED) { Serial.println(F("* Disconnected or advertising timed out")); } // OK set the last status change to this one laststatus = status; } if (status == ACI_EVT_CONNECTED) { // Lets see if there's any data for us! if (BTLEserial.available()) { Serial.print("* "); Serial.print(BTLEserial.available()); Serial.println(F(" bytes available from BTLE")); } // OK while we still have something to read, get a character and print it out while (BTLEserial.available()) { char c = BTLEserial.read(); Serial.print(c); } // Next up, see if we have any data to get from the Serial console if (Serial.available()) { // Read a line from Serial Serial.setTimeout(100); // 100 millisecond timeout String s = Serial.readString(); // We need to convert the line to bytes, no more than 20 at this time uint8_t sendbuffer[20]; s.getBytes(sendbuffer, 20); char sendbuffersize = min(20, s.length()); Serial.print(F("\n* Sending -> \"")); Serial.print((char *)sendbuffer); Serial.println("\""); // write the data BTLEserial.write(sendbuffer, sendbuffersize); } } } |
This code is actually found in the Adafruit_BLE_UART folder you downloaded earlier, under the examples folder in a file called echoDemo.ino.
In Xcode click the Run (play) button using the All target. You should get a Build Failure with an error:
Shell Script Invocation Error SPI.h: No such file or directory
Recall that we are dealing with C++ when working with Arduino, and a header inclusion failure is likely the result of failing to specify that we are using some library. In this case we are wanting to use the Arduino SPI system library and didn’t tell Xcode in our Makefile. So open the Makefile and find the lines:
|
1 2 3 4 |
# List application Arduino/chipKIT/Digispark/Energia/Maple/Microduino/Teensy/Wiring libraries here # default = 0 = none # APP_LIBS_LIST = 0 |
Change the APP_LIBS_LIST line to APP_LIBS_LIST = SPI and try to compile again. The error now should be a failure to find Adafruit_BLE_UART.h, which is a part of a user library. Looking back at the Makefile we see a USER_LIBS_LIST definition, so change it to
|
1 |
USER_LIBS_LIST = Adafruit_BLE_UART |
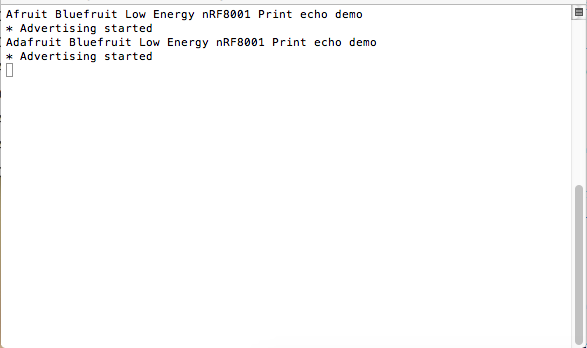
Run again and you should see a terminal screen pop up like this:
If you are seeing the same output, congratulations! You’re almost there.
Now, let’s grab an application for our iPhone to connect to our Bluetooth module! On your iPhone search for the nRF UART application from Nordic Semiconductor. Download and open the app on your iPhone and, of course, ensure Bluetooth is enabled!
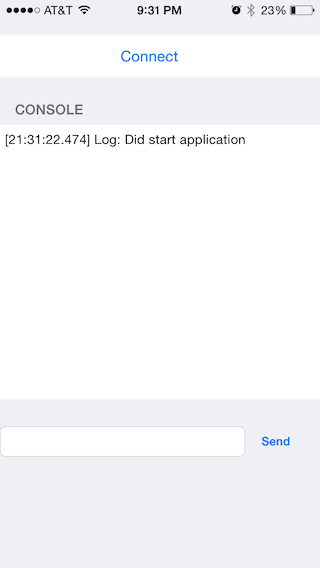
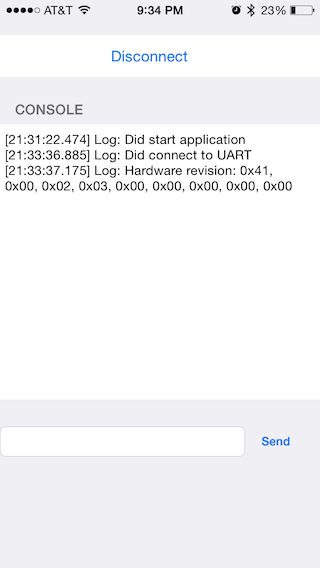
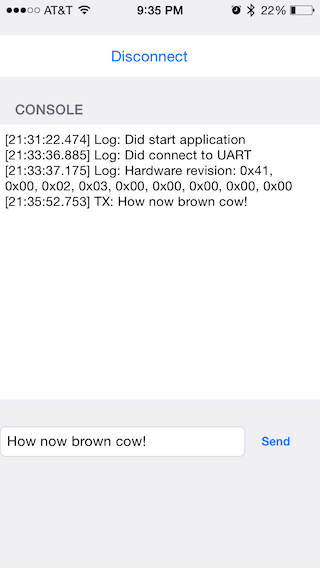
The nRF UART app isn’t fancy – a button to Connect to the Adafruit BTLE board, a Console showing you what’s going on, and a text field for sending text.
Bring your Adafruit terminal log into focus on your Mac and then press the Connect button on the nRF UART app on your iPhone. If everything is working properly (all of your pins are wired to the right spot and the application is running) you should see Connected! on your Mac terminal and the console log on the iPhone indicating that a connection was successful.
Now, type some text in the textfield on the iPhone app and press Send. If everything is working properly you should see the text you typed in your phone show up in your Arduino application console!
Get the Code
The complete Xcode project for working with the Adafruit nrf8001 is on Bitbucket. Remember, you must have the Adafruit_BLE_UART library installed in your Arduino user library folder.
Acknowledgements
This post is really made possible by Kevin Townsend and his article on Adafruit. As I’m quickly learning, much of Arduino magic comes from the fact that it just works. For example, although I know SPI and some BTLE protocol details, I didn’t have to lean on that knowledge to put this tutorial together or get my iPhone and Arduino/Adafruit BTLE communicating!
