Editor’s Note: This is Part One in a series of articles on creating a Swift iBeacon application. By the end of the series you will have written a “game” in Swift called You’re Getting Warmer! which allows you to track down and find a beacon. Part One gets you up and running iBeacon with a Gimbal Proximity Beacon Series 10.
To get started with iBeacon you’re going to need some iBeacon-compliant Bluetooth Low Energy devices. The immediate question is “What does it mean to be iBeacon-compliant?” Simply put, Apple has specified a Proximity Beacon Specification for Bluetooth Low Energy that advertises three pieces of information in a single packet:
- a UUID
- a major version number
- a minor version number
And that’s it. Seriously, that’s all an iBeacon does, broadcasts its identifier into the ether. Think of it as an AM radio station stuck on a taking a pause for station identification loop.
As simple as the beacon specification is, all sorts of applications are possible with it. The most commonly cited application is targeted retail, though as the article makes clear, consumers haven’t actually embraced the idea of shopping while being bombarded with advertisements and offers through apps.
Regardless, iBeacon remains an interesting technology to work with, and in this tutorial we’re going to order up some beacons and track them in our iOS Swift application.
Get Some Beacons
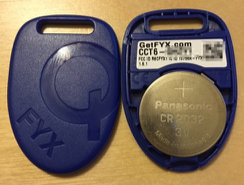
This tutorial will utilize the Gimbal Proximity Beacon Series 10 beacons. Order some up, wait a few a days (or a day if you pay for it), and you’ll get one of these in the mail:
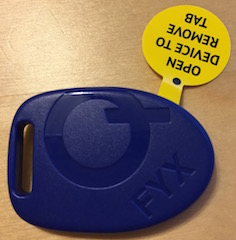
If you’re like me you were dying to open it and get it working. But there’s a few steps you’ll need to do first, starting with creating a developer account at Gimbal.com.
Gimbal Developer Account
Browse to the Gimbal Manager Sign In page and click Register. Fill out the required fields, check the I accept checkbox to accept the Gimbal Developer Agreement, and then click Sign Up. You will be sent an e-mail to confirm your registration. Click Confirm my account in the e-mail.
Once your account is confirmed you will be directed to the Gimbal Manager portal. It is here in the portal where you can activate a new beacon, as well as create Beacon Configurations.
All Beacons are not iBeacons
It should noted here that while all mammals are animals, not all animals are mammals. The same is to be said about iBeacons: all iBeacons are beacons, but not all beacons are iBeacons. In fact, the Gimbal Proximity Beacon Series 10 beacons you received are not configured as iBeacons at the factory, but rather as Series 10 Presence. Before we can make use of the CLLocationManager beacon API we will need to reconfigure our Gimbal as an iBeacon. Here’s how we do that.
Step 1. Download the Gimbal Beacon Manager application on your iPhone.
Allow Beacon Manager to access your location in order to see your Gimbal Beacons.
Press Get Started and Accept the Terms of Service and Privacy Policy.
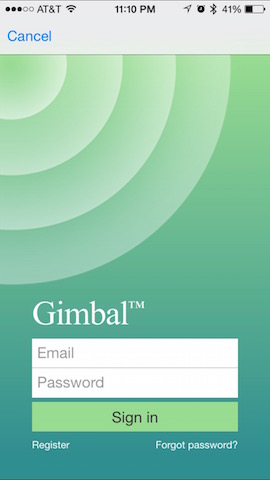
When you get to the Sign In screen enter your email and password used to register with the developer portal.
Once you are logged in you will see My Beacons with a note that “we don’t see any of your beacons nearby.”
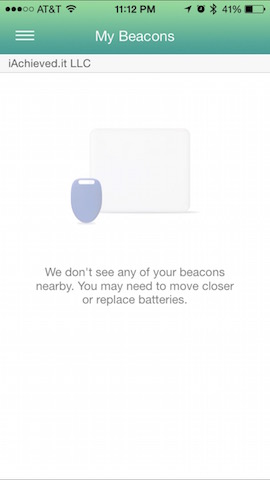
Now, let’s set one up as an iBeacon.
Step 2. Obtain a UUID
Recall that iBeacons broadcast a UUID. You can obtain one here. Copy the UUID generated because you are going to use it in the Gimbal Manager as well as your iPhone app.
Step 3. Create an iBeacon configuration in the Gimbal Manager by clicking the Beacon Configurations menu option.
In the upper-right corner of the Beacon Configurations page click New Configuration.
We’ll name our configuration iBeacon Demo, set the Beacon type to iBeacon, provide our UUID (obtained in Step 2), and set our Major and Minor version numbers. Click Create Configuration when done.
![]()
Step 4. Activate our beacon.
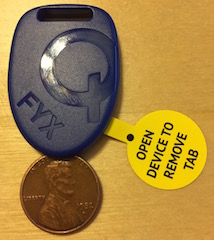
Now to the fun part, activating our beacon! If you recall, our Gimbal beacon was delivered to us with a tab marked OPEN DEVICE TO REMOVE TAB. Now its time to open it. I have found that a United States penny is useful here. Take the penny and insert it into the notch at the bottom of the beacon like so:
Holding the sides of the beacon twist the penny clockwise and you should hear a hearty snap and the top cover pop off. Place the negative side of the battery into the battery holder and make note of the 9-character alphanumeric code. This is referred to as the Factory ID.
Don’t put the cover back on yet (you’ll be tempted to I know).
To activate the beacon go to the Beacons page in the Gimbal Manager and click Activate Beacon in the upper-right hand corner. Fill out the beacon information, uncheck Create Place (we won’t be using this feature) and click Activate Beacon.
The Factory ID is the 9-character alphanumeric code printed on the label inside the beacon. You can omit the dash when entering the Factory ID if you like.
![]()
Your beacon is now activated!
Step 5. Configure our beacon.
Okay, it’s clear from Step 4 that activating a beacon doesn’t mean that the beacon is broadcasting anything. In fact, it might as well have been called register beacon, because that’s really what you are doing, registering your ownership of a valid Gimbal beacon. To configure the beacon we need to turn to the Beacon Manager iPhone application. Why? Because your iPhone can communicate with the beacon via BTLE, query its information, upgrade its firmware, and upload all of this information to the Gimbal Manager portal in the cloud.
Notice how in the Gimbal Manager our beacon is reporting “Unknown” as the battery level. Of course it does; our beacon has never reported in via the Beacon Manager iPhone app.
However, for the Beacon Manager application to know what configuration to update the beacon with, it must obtain that information from the Gimbal Manager portal.
Step 5a. Assign a Configuration in Gimbal Manager
In the Beacons page in Gimbal Manager, select the beacon you just activated, and then click on the disclosure triangle on the Configuration bar.
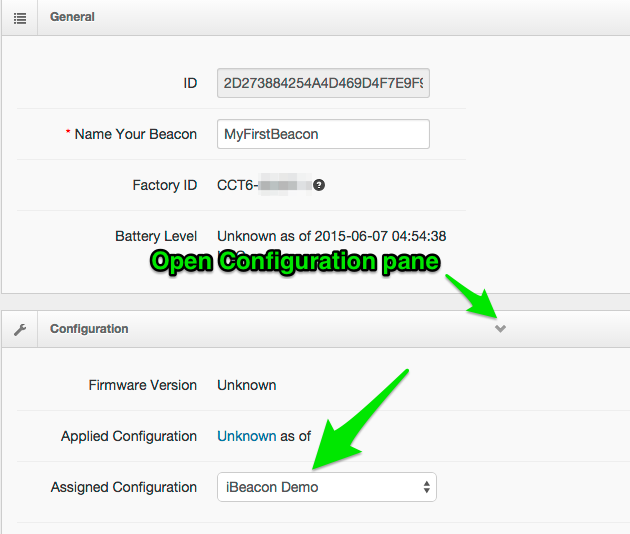
Set the Assigned Configuration to iBeacon Demo.
Scroll to the bottom of the page and click Save.
Step 5b. Configure the beacon in Beacon Manager.
On your iPhone open the Beacon Manager app and select Configure from the menu. Note that it says Scanning for beacons and hints that in order to configure a beacon you need to effectively reboot it. This is why we didn’t bothering popping the cover back on earlier!
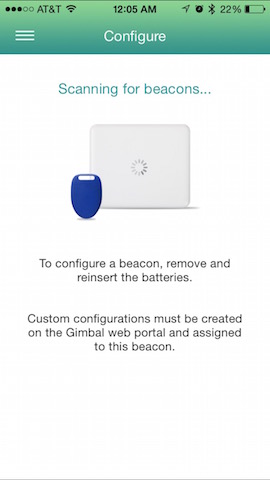
Now you can place the cover back on the Gimbal beacon! Once the cover is on you will see the Beacon Manager update to something like this:
Press Update Beacon. The Beacon Manager app will use BTLE to update your beacon to the configuration you created in the Gimbal Manager application.
Once the update is complete you’ll be ready for some CLLocationManager coding!
Next Up
In Part Two of this series we will write a iOS Swift application that listens for and displays details about our newly created iBeacon. Stay tuned!
Postscript
As you’ve walked through this tutorial and worked in the Gimbal Manager portal, you undoubtedly came across the Gimbal Proximity SDK. The first question you might ask is, “Why is there an iOS SDK for Gimbal when iOS already supports iBeacon?”
Like we said above, all beacons are not necessarily iBeacons. Proximity is a different beacon technology from iBeacon, and to enable integration into iOS and Android, Gimbal provides SDKs for the two platforms. With iOS we know that CLLocationManager supports receiving updates from iBeacon-compliant beacons, whereas with Proximity we would have to use the Gimbal SDK.